I am sorry for the lack of post lately. I have been out of commision for a while due to tendon surgery on my left hand. I want to thank everyone who has been patient during this time and also those who have helped along the way. There are so many good people in this town.
I hope to get back to full use of my hands in 2-3 weeks. I believe making a chair should be good physical therapy. I have one student in January and 3 in late Febuary so I must follow all the doctors orders. If I damage the same tendon before it heals can mean much longer recovery or possible loss of movement in that finger. Anyway, lesson learned. Never hold the piece of wood in one hand while aiming the chisel with the other. I guess I didn't take my own blog entry serious enough about taking my hands for granted.
I do now.
Thursday, December 16, 2010
Wednesday, September 22, 2010
Wood Mizer

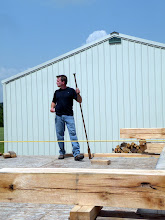
Back in the spring of 2006 we had a tornado devistate our area. I watched in fear the funnel going across my front yard within a 100 yards of my front porch. The storm left many trees along the creeks down. These were good size trees with really straight trunks. The city was going to bulldoze them into piles to burn. This was the time I reallized maybe a sawmill might be a good investment. A few months after the storm I drove to Wood Mizer in Indiana to pick up an LT-40 sawmill. This is the biggest tool I have ever bought. I quickly cleaned up and cut lots of walnut and oak from along the creek banks. Since that time I have cut many logs and air dried lumber in my pole barn. My plan was to use the pole barn as my wood shop but it filled so fast with drying lumber that this was not an option. Later it dawned on me to build a timber frame using the mill which turned out much better than I ever thought. Another benefit having the mill is re-sawing wide boards for bookmatching panels for doors and matched panels for table tops.
This past week I cut some very nice , clear cherry and walnut. You can see the cherry below how straight the log was which around here can be rare.
 Bill found this tree near his place. The tree lost its top and he was afraid it might start taking on water and rot prematurely. The walnut he found was very straight and had very little sap. These logs were fun to cut. It was good to get out of the shop a while and cut lumber next to the woods.
 After cutting about 500 ft or so to fill my trailor I had to get it home to stack for drying. I use blocks leveled as a base. The stickers are spaced about every 2 feet and lined up in the pile. I still need to add weight (more blocks) on top to keep everything flat. This stack will air dry for about a year for the 4/4 stock and longer for the 5/4. I have a small fan in the wall to draw out moisture and keep the door open on the other end. I have found this pole barn to dry wood at a good rate with very little checking. If you dry too slow you can have mold and too fast could cause unwanted stress in the boards or surface checks.
 I was able to cut some 17''-19'' wide 5/4 cherry for table tops. I also like to quarter saw smaller logs. These two trees will provide some really nice material for next season.
 I also cut out the crotch material where the tree forks. You can get some interesting grain patterns here where the tree tries to hold itself together. I'll use these for drawer fronts or even live edge benches. The bottom line is I can cut logs the way I want and not have to try to match boards from a large lumber yard or pay those high prices for boards full of sap wood. The mill has already paid for itself many times. Now if I can just convince my wife.
 This weekend I'll be at the TACA craft fair in Nashville again showing chairs and dodging rain showers. Back to work!
Thursday, August 19, 2010
Epoxy?
I wanted to show the bird cage arm chair before painting. Curtis Buchanan said he uses epoxy on the false miter joint seen below. I decided to try this even though I had reservations of using the stuff. Once glued this way there is no turning back. It worked wonderful and closed any gap I may of had. The joint is a 3/8'' turned tenon into a blind mortise on the top rail. I have run the post through the rail with a wedge in the past but I like the clean look of this method much better.
 I haven't coompletey decided on a color scheme yet for this chair. With all the gutters carved in the seat and v-grooves on the turnings I know I will accent these in some way. Stay tuned.

 I haven't coompletey decided on a color scheme yet for this chair. With all the gutters carved in the seat and v-grooves on the turnings I know I will accent these in some way. Stay tuned.
Monday, August 16, 2010
A Bird in the Hand
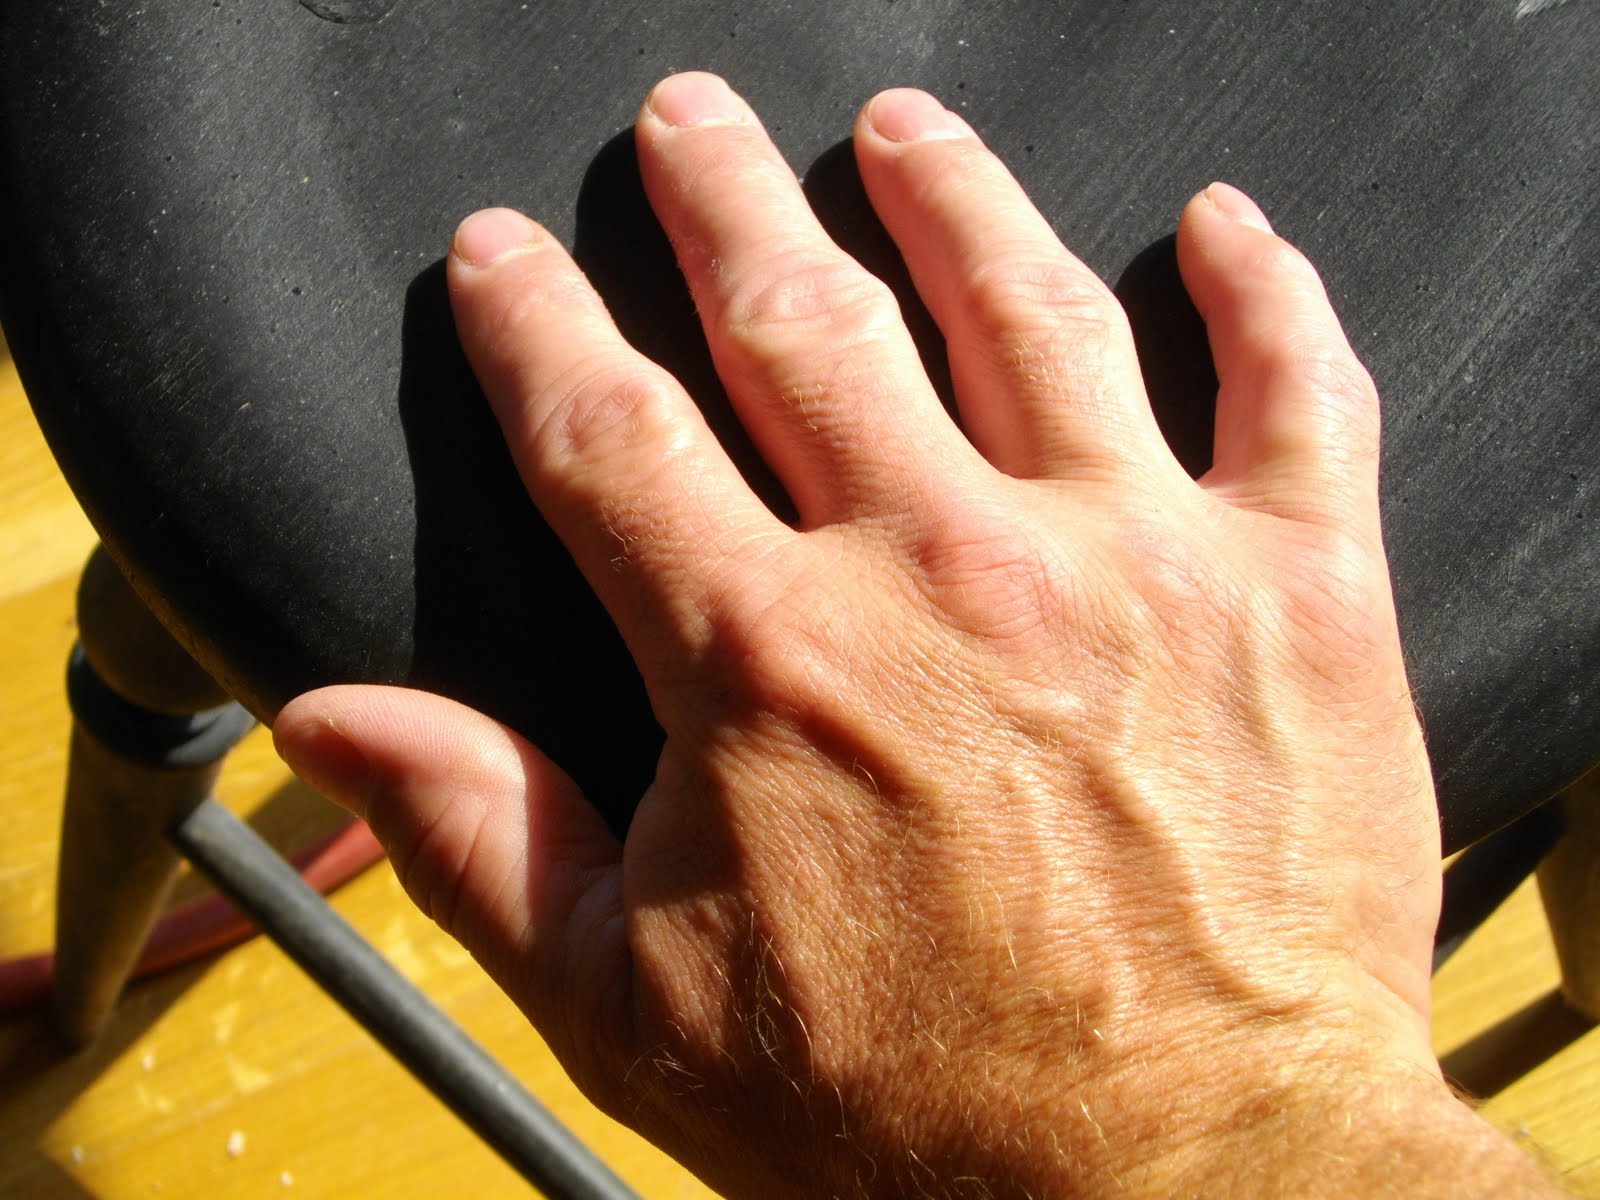
One of the best tools we have is our hands. Sometimes I take them for granted and forget that they cannot be replaced. Recently I learned that one of my friends working on a timber frame structure had pinched off the end of his finger while a dovetail joint fell together unexpected. Even the wood itself can be dangerous, not just the tools. Sometimes you can do everything right and stuff just goes wrong. I know my friend will be ok and keep on working wood but I sure hate to hear such stories.
This is my hand below. Nothing fancy, just a hand. To make this tool as efficient as I can it needs to have strength, a strong heart and lungs for support as well as good nutrition. To do this I try to excercise and eat right. Not always easy but letting myself fall apart would be as bad or worse as never sharpening my tools.

 Recently I completed the loft which allowed me to move lots of stuff off the main floor. Then I finished the sharpening station cabinet with the recycled granite top. You can see it behind the Bird Cage chair. I have built lots of cabinets based on shaker style. I love the simple lines which shows off the cherry really well. I had fun making boxes for a change but have really enjoyed getting back to chairs. The shop is now starting to get that familiar, comfortable feeling which allows me to work more organized and focused on the task.
This is my hand below. Nothing fancy, just a hand. To make this tool as efficient as I can it needs to have strength, a strong heart and lungs for support as well as good nutrition. To do this I try to excercise and eat right. Not always easy but letting myself fall apart would be as bad or worse as never sharpening my tools.
Today I glued up the Bird Cage chair I started at Curtis' shop. We never went over the details for completing this chair before I left. It was an adventure to say the least but over all was succesful. I still need to glue the top rail and carve the false miter. I have done this before so maybe tommorrow I'll be ready for paint. This has to be one of the more complicated chairs to make but the challenge has been great fun. I learned so much with this chair and look forward to evolving designs based on this style. And oh is it comfortable!
 Recently I completed the loft which allowed me to move lots of stuff off the main floor. Then I finished the sharpening station cabinet with the recycled granite top. You can see it behind the Bird Cage chair. I have built lots of cabinets based on shaker style. I love the simple lines which shows off the cherry really well. I had fun making boxes for a change but have really enjoyed getting back to chairs. The shop is now starting to get that familiar, comfortable feeling which allows me to work more organized and focused on the task.
 Soon I will show the Bird Cage chair complete. Now if I can just figure out where to put the birds.
Wednesday, August 4, 2010
The Loft
Recently I was able to put the beams I cut from the old dead red oak to good use. I hewed the 3 x 6 joists down to 3 x 4 at the ends and mortised them into the cross-beams of the timber frame. I spaced them on 24'' centers and ran them 3'' into the crossbeam. I added blocking down the center and the floor seamed really sturdy.


 I framed in an attic pull down ladder to access the loft. This kept a staircase from eating up shop space.
 After all the joist were in place I nailed down tongue and groove bead board and then plywood flooring on top of that to make a strong floor for storage. The bead board is mainly for looks and it was cheap. I found the stuff at the Habitat for Humanity store in Nashville and bought all thay had.
 I now have plenty of space to store all the clutter out of the way. There is room to add another loft on the other end of the shop but that can wait til winter.
 Here is the comb bending form for the fan back chair I had left off of the previous blog entry. Please send me some pictures if anyone makes one of these chairs. Best of luck!


Tuesday, July 13, 2010
Sawyer Fan Back II
Well, here is the finished "Dave Sawyer" fan back windsor chair ready for milk paint, otherwise called "in the white". I really like the classic look. The chair is very light and sits you up to a table. Very comfortable.

For those of you who are ambitious woodworkers wanting to try a chair I have included
somewhat of a road map below. The first figure is the post turning which can be difficult due to it's size and length and possible chatter. I like to use green maple that has been drying down to about 15% moisture content. If you turn this post dead green it will "egg" shape when dry and possibly warp to the point where it is noticeable throwing the chair out of alignment. Next is the comb which I did not give the bending radius but if anyone needs this I can post later. This I make from green white oak split from the log. I completely carve then steam bend. After drying in the kiln I scrape and clean the details. (don't sand). The posts will enter the comb 11/16" from the ends of the bottom of the comb. There is lots of shaping I cannot show here.
 The final figure and probably most needed is the seat pattern and sight lines. If you understand the sight lines this should be clear. These drawings will work best if you have made a chair before. The seat has elaborate carving. The grain runs front to back. I usually drill all holes then carve the seat which erases all the sight lines. The seat blank usually hand planes out to 1 7/8 " thick.
 The chair looks best with the baluster turning for the legs. I usually make the seat height 18" in the front dropping an inch to 17" in the rear. The 7 spindles are 21" rough length with 1/2" tenon in the seat(dry) and 3/8" tenon in the comb(dry). I know this is only the tip of the iceburg but if you have done windsors before then you can do this. Good luck, now go make Dave proud!
For those of you who are ambitious woodworkers wanting to try a chair I have included
somewhat of a road map below. The first figure is the post turning which can be difficult due to it's size and length and possible chatter. I like to use green maple that has been drying down to about 15% moisture content. If you turn this post dead green it will "egg" shape when dry and possibly warp to the point where it is noticeable throwing the chair out of alignment.
Next is the comb which I did not give the bending radius but if anyone needs this I can post later. This I make from green white oak split from the log. I completely carve then steam bend. After drying in the kiln I scrape and clean the details. (don't sand). The posts will enter the comb 11/16" from the ends of the bottom of the comb. There is lots of shaping I cannot show here. The final figure and probably most needed is the seat pattern and sight lines. If you understand the sight lines this should be clear. These drawings will work best if you have made a chair before. The seat has elaborate carving. The grain runs front to back. I usually drill all holes then carve the seat which erases all the sight lines. The seat blank usually hand planes out to 1 7/8 " thick.
 The chair looks best with the baluster turning for the legs. I usually make the seat height 18" in the front dropping an inch to 17" in the rear. The 7 spindles are 21" rough length with 1/2" tenon in the seat(dry) and 3/8" tenon in the comb(dry). I know this is only the tip of the iceburg but if you have done windsors before then you can do this. Good luck, now go make Dave proud!
Sunday, July 11, 2010
A Fan (back) of Dave Sawyers
While spending time with Curtis I got to see many of the chairs he has made over the years. One in particular is a fan back side chair which had been designed by Dave Sawyer from Vermont. I have not met Dave but only talked over the phone. He was making chairs long before a lot of us knew how to sharpen a draw knife. He was Curtis' first influence in chair making back in the 80's. Curtis has always talked very highly of Dave and said he was very giving of all his chair designs. Curtis has always given forward in sharing his designs as well. The fan back Dave designed remained unchanged with Curtis' hands because Curtis says it looks great 360 degrees. He highly suggested I build one to appreciate what Dave had done. So this week I will share my version of Dave's fan back. I am sure many fellow chair makers have made his chair. It is sweet.

I will post pictures of the fan back as soon as it is complete. Below are the swivel barstools I had been working on. I have two more to finish to complete the order. Tom & Shelly seemed to really like them. Tom is Logan's baseball coach. Logan has really impressed me this year due to the hard work and dedication Tom puts into my son's team the "Diamond Jaxx".

My garden has kept me busy lately. Everything seems to come in at the same time. Kim has made many jars of bread and butter pickles. We have froze sweet corn and now the tomatoes are coming in. The watermelon are getting close and the peaches and cream corn is not far behind.


Monday, July 5, 2010
Website in Progress
I have been working on my existing web site trying to bring it back to life. As time goes by I will add better photos to the gallery and more info on classes and chairs. Thanks for all your patience. http://www.penningtonwindsorchairs.com/
Saturday, June 19, 2010
The Garden
This past week I have spent with chairmaker Curtis Buchanan and his family. We worked on a bird cage arm chair in his back yard shop in Jonesborough, Tn. Curtis has an amazing family who is so giving of their time and energy making you feel like family. Making this chair is only part of the fun. I learned more about organic gardening as well as eating some of the best meals which mostly came from the garden. Curtis has an amazing balance in his life knowing when to work, when to garden, or spend time with friends and family. Even his soil has balance. I have to show his garden below. It takes up the whole back yard. There is no grass to cut.

Curtis' timber frame shop was my inspiration for my own shop after seeing it years ago. His shop keeps looking better with age. I took some pictures to show you how it looks but you have to be there to really get the feel of this one man chairmaking shop.

 We had a great week getting lots of chair work done. We drove to the log yard and I picked up an awesome sugar maple for turnings. I can't get good maple in middle Tn like they have near the Appalachians. Curtis liked his table I made for his family. We broke it in right with his mothers incredible Italian cooking. You can see the table below. Notice some of Curtis' chairs around the table, very cool. Thanks again Curtis!

Friday, May 21, 2010
Eye to the Sky!
Thanks to weather technology and early warning systems and 8 windows around my shop I can get really close to the action when it comes by. I wish you could have seen the movement of these clouds. It was not a tornado but wasn't far from being one. The weather people called for a severe thunderstorm warning for my county but we dodged the bullet. Lately the weather has been very interesting in middle Tennessee.
 The barstools I have been working on shows below the mock-up for what they might look like. The card board is flimsy but I like to see in 3-d when doing something new and it's the quickest way to get results and work out the bugs. The swivel will be mortised into the lower part of the stool and somewhat into the seat. It will be sort of a hybrid windsor/ ladder back stool. Thanks Brian for your influence. I knew your class would come in handy someday.

I'll be posting more of the process soon.
The barstools I have been working on shows below the mock-up for what they might look like. The card board is flimsy but I like to see in 3-d when doing something new and it's the quickest way to get results and work out the bugs. The swivel will be mortised into the lower part of the stool and somewhat into the seat. It will be sort of a hybrid windsor/ ladder back stool. Thanks Brian for your influence. I knew your class would come in handy someday.I'll be posting more of the process soon.
Sunday, May 16, 2010
Career Day
I had the opportunity to spread some knowledge of woodworking to the wonderful kids at Whitten Elementary School on Career Day. They were very excited to see wood shaved on a shave horse. They were struck by the strong smell of white oak. I explained how furniture comes from trees. They liked it when I blew bubbles through a piece of red oak with liquid soap to explain how there are pores in wood. They asked more questions about the shave horse than my chairs I brought. I hope maybe something I said might spark some interest in these kids. They are wonderful people with very curious minds.
 I have been without my computer lately and have not been able to post but I have returned. We have had all sorts of devistation around me here in middle Tn with flooding but we were fine. All my questions where water could go were answered with 13 inches of rain in 48 hours. My heart goes out to those who lost so much.
On my last post I had mentioned uncle Kenny's adze which he got from his grandfather. It was a nice piece of forged metal which after cleaning and sharpening took a really good edge. As you can see below with the new handle it is now a very usable tool but not for tilling the weeds from the garden (O.K. Kenny).

 The steam bent handle was easily shaped from white oak, dried in the kiln, then carved to fit the adze, then split and wedged. A little oil on the handle, done. This tool with the flat edge really removes wood fast for hewing timbers. I wish it had been curved to chop out seats but none the less it is a beautiful tool.

 This week I have started on some barstools that swivel, should be interesting. The biggest challenge will be to design the stool to look good with the bulky swivel section. Stay tuned.
I have been without my computer lately and have not been able to post but I have returned. We have had all sorts of devistation around me here in middle Tn with flooding but we were fine. All my questions where water could go were answered with 13 inches of rain in 48 hours. My heart goes out to those who lost so much.On my last post I had mentioned uncle Kenny's adze which he got from his grandfather. It was a nice piece of forged metal which after cleaning and sharpening took a really good edge. As you can see below with the new handle it is now a very usable tool but not for tilling the weeds from the garden (O.K. Kenny).
 The steam bent handle was easily shaped from white oak, dried in the kiln, then carved to fit the adze, then split and wedged. A little oil on the handle, done. This tool with the flat edge really removes wood fast for hewing timbers. I wish it had been curved to chop out seats but none the less it is a beautiful tool. This week I have started on some barstools that swivel, should be interesting. The biggest challenge will be to design the stool to look good with the bulky swivel section. Stay tuned.
Tuesday, April 27, 2010
Bevel Up or Bevel Down?

The first time I used a draw knife was to build my first chair. Man were my hands sore and my thumbs were numb from gripping this tool learning and feeling it's power. I only thought I had control of this simple tool but was fighting what I did not understand. What I quickly learned was how the relationship between the blade and handles determined whether the tool should be used bevel up or down. From what I have learned over the years is that when the handles are in line with the blade then it is a bevel down knife. Using the bevel down knife gives you more freedom to cut coves such as the side of windsor seats. When the handles are not in line with the blade you use the knife bevel up. The flat back of the blade will ride along the long fibers of the wood giving you great control to follow the grain. The best way to check which knife you have is to sit down at the shave horse and pull the knife toward you till it starts to cut. At that point if your wrist are popped up higher than your hands then flip the knife over and try again. Your wrist should be in line or slightly lower than your hands and the knife should perform much better.
When making spindles for windsor chairs I like the control I get with a "bevel up" knife. Most of the knives I have are "bevel down" . Upon reading Pete Galbert's post on replacing the handles on his draw knives I saw my opportunity to finally fix all my knives to perfection. At least to me. I had 3 knives to repair handles and two of them to turn into a bevel up draw knife by simply bending the handles. Now I did the first one cold with no problems. If you have really thick metal you could use a small torch to heat the handles (after the wood handles are removed) to aid in bending. Just stay away from the blade so you don't lose the temper of the steel. The picture below shows the handle furthest away from you still in line with the blade and the handle closest has already been bent. It is not a severe bend at all and could be done with the wood handles on in a metal vise and padded vise grips. If you were to make a pommel knife by bending the handle straght out on one side then heating to a cherry red is a must or the arm would most likely break. 

Here are some shots of one of the draw knives after turning new handles and bending to make a bevel up knife. After sharpening this $12 flea market knife really sings. I'll let the pictures speak for themselves. See Pete's blog on how he did this.


 Stay tuned for the restoration of uncle Kenny's adze. He gave this to me to use on the soon to be floor joist for the new loft. It had a tobacco stick for a handle and he used it to dig the weeds from the garden.
Tuesday, April 20, 2010
Ready for the Trip!
The settee going to the museum in Ireland is complete. It will be picked up on Thursday to be shipped. I wish I could go with it .I guess maybe a part of me will.


 I think the settee turned out good and has a nice look in its simplicity. I have learned plenty in reproducing this piece and inspired to try some new designs. I am grateful to the Tennessee Historic Society for this opportunity and I hope I can work with them in the future.


 I think the settee turned out good and has a nice look in its simplicity. I have learned plenty in reproducing this piece and inspired to try some new designs. I am grateful to the Tennessee Historic Society for this opportunity and I hope I can work with them in the future.
Wednesday, April 14, 2010
Chairs Old and New
The Rogan house settee going to the Mueseum of Ireland is coming along nicely. Below you see the one piece poplar seat being scraped. Although this piece looks very simple the complex drilling angles to match the original has been a challenge. I would love to know how they did this back in the 1830's. Using Peter Galbert's method of drawing sight lines and getting the resultant angles has really helped. Also scribing the line to the leg and drilling with one angle has become habit now and really keeps things accurate both sides of center. No more wind swept looking chairs. Thanks Pete, the results of your wonderful techniques will follow this settee all the way to Ireland.
I'll post the finished settee soon.


I'll post the finished settee soon.

Last week I spent a lot of time at my parents house cutting down the big red oak. When searching around Dad's garage looking for splitting wedges and mauls I came across some family history. The chair pictured below was my grandfather's first chair when he was a child. The chair had been forgotten and left under the crawl space for the last 30 years or so. If I had to guess it probably is about a 100 years old. The arms are 2 different sizes and the arm posts are not an exact match. The original color seen underneath the seat was turqoise. I can't decide whether to restore this chair or reproduce it. It was cool to find it. My grandfather taught me many things when I was young. How to swim, how to draw and use oil and acrylic paints, how to play guitar, golf, and many other things but never chair making. He passed away back in 1986 when I was just 16. Now all these years later I will learn from him again by the study of this chair.
Sunday, April 11, 2010
Goodbye Old Friend
Several years ago we were hit by a severe drought in our area of middle Tennessee. This was the worst drought I can ever remember. It killed many trees, shrubs, and gardens. One tree in particular stood next door to my parents home where I grew up. This tree seen below draped my parents back yard standing over 80 feet tall. The loss of this tree has made me think of all the times spent under its canopy raking many leaves from its branches, hearing the wind blow through the top during spring storms, and watching animals build homes safely up high. This tree has been a big part of my childhood but has gone really unnoticed. It's part of the landscape that I assumed would always be there. So this is my dedication to this old red oak. Goodbye old friend.
 We cut the tree down last week for fear of it losing branches putting the children in danger. The tree leaned toward some homes behind my parents yard so we had to use cables, ropes, and a truck to pull it the safe direction. This isn't so hard with a small tree but 3 feet in diameter and 80 feet tall put some concern not only on me (who was doing the sawing) but on the nieghbors near by and Shawn who owned the tree. Below is the video that Shawn Lance took as the tree came down. Notice at the end of the video after the tree hits the ground the wisk of wind coming past the camera. It's sort of the last breath of energy the tree could give.
We were able to cut this oak on my sawmill. It will live on as floor joists for the lofts in my timber frame shop. Not a very romantic way to honor this tree but I will remember it everytime I look up. The 24 3x6's you see below came from one log.
Subscribe to:
Posts (Atom)