Friday, March 29, 2013

In Search of Stone

I just got back from delivering some pieces to a customer in the Pisgah National Forest in North Carolina. What a beautiful place. We stopped by Cades Cove on the way back. I wanted to check out the foundations of all the old cabins. I was shocked to see how most foundations were crudely stacked stones to make piers. 
 After looking at many structures I decided I liked the dry stacked stones on this cabin which is what I will do for the timber frame tool shed. My son Logan and I harvested many stones last summer in the local creeks but I realize I will need a lot more. Here in middle Tennessee there are as many rocks as there are republicans. I should have no problem finishing the foundation.

 I could not resist taking some waterfall shots during our trip. I really miss the mountains. It was 20 years ago this month that my wife and I were trapped in Pigeon Forge during the blizzard of 1993. It was called the storm of the century and Mt. LaConte got 5 feet of snow. We had reservations for Kephart trail shelter and never made it. They had to use military helicopters to rescue hikers out of the mountains.
 Sorry, I'm getting off topic. Here is Logan from our trip with a rock from the Little Pigeon river in the national park. He wanted to have one for the garden shed in the foundation. Logan is very sentimental and I find that a good trait in such a young man. I hope to have the foundation to the tool shed done soon. I have had lots of people interested in helping with the joinery of the timber frame so I'll post when I am ready to get started on the frame.
 Speaking of timber frames, Ziggy from the Dancing Rabbit is conducting a timber frame workshop this summer. If you want to learn the ins and outs of constructing a timber frame structure I can't think of a better place to go. You can sign up here.Timber Frame Workshop. Ziggy and April spent some time here at my shop building chairs and other projects last winter. They live unique lives without electricity in a cool cob structure they built in Missouri. You can learn a lot from them and I highly recommend the workshop.


Tuesday, March 19, 2013

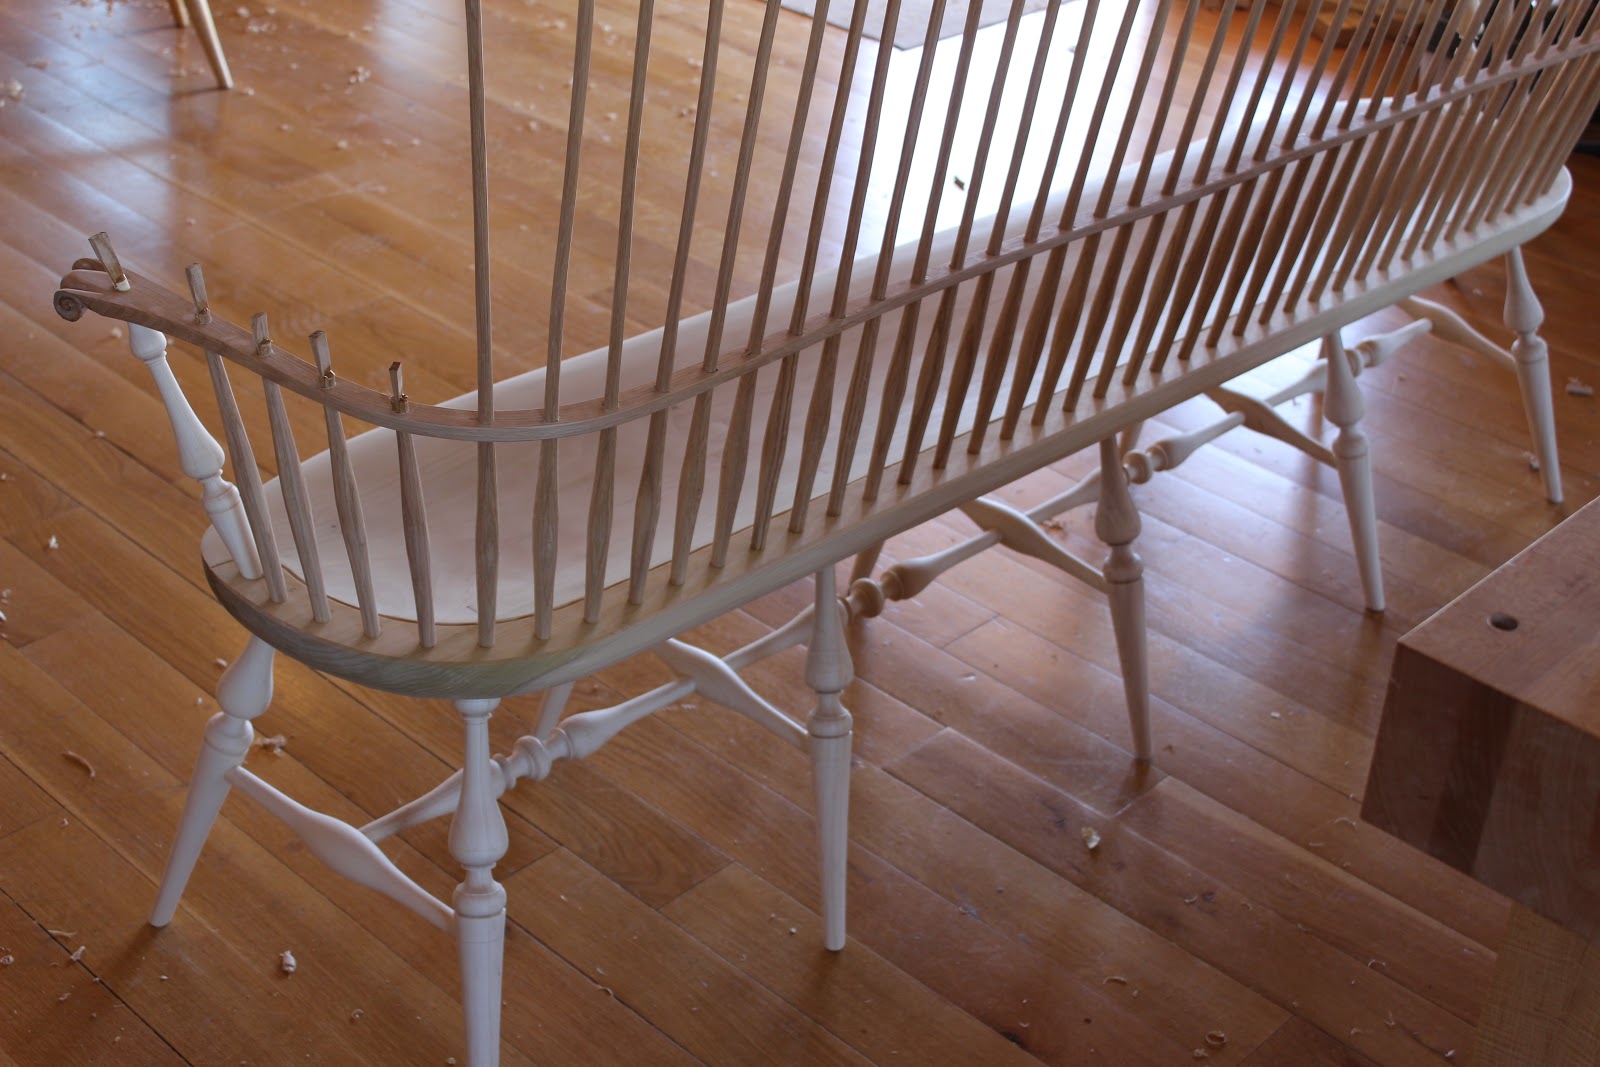
Classic Settee Complete


The 6' settee is finished. The painting took as long as building the piece but I feel it was worth the time spent. This bench will travel with me to the next show in Nashville this spring at the TACA craft fair. Come by and check it out. It's the first weekend in May at Centennial Park.
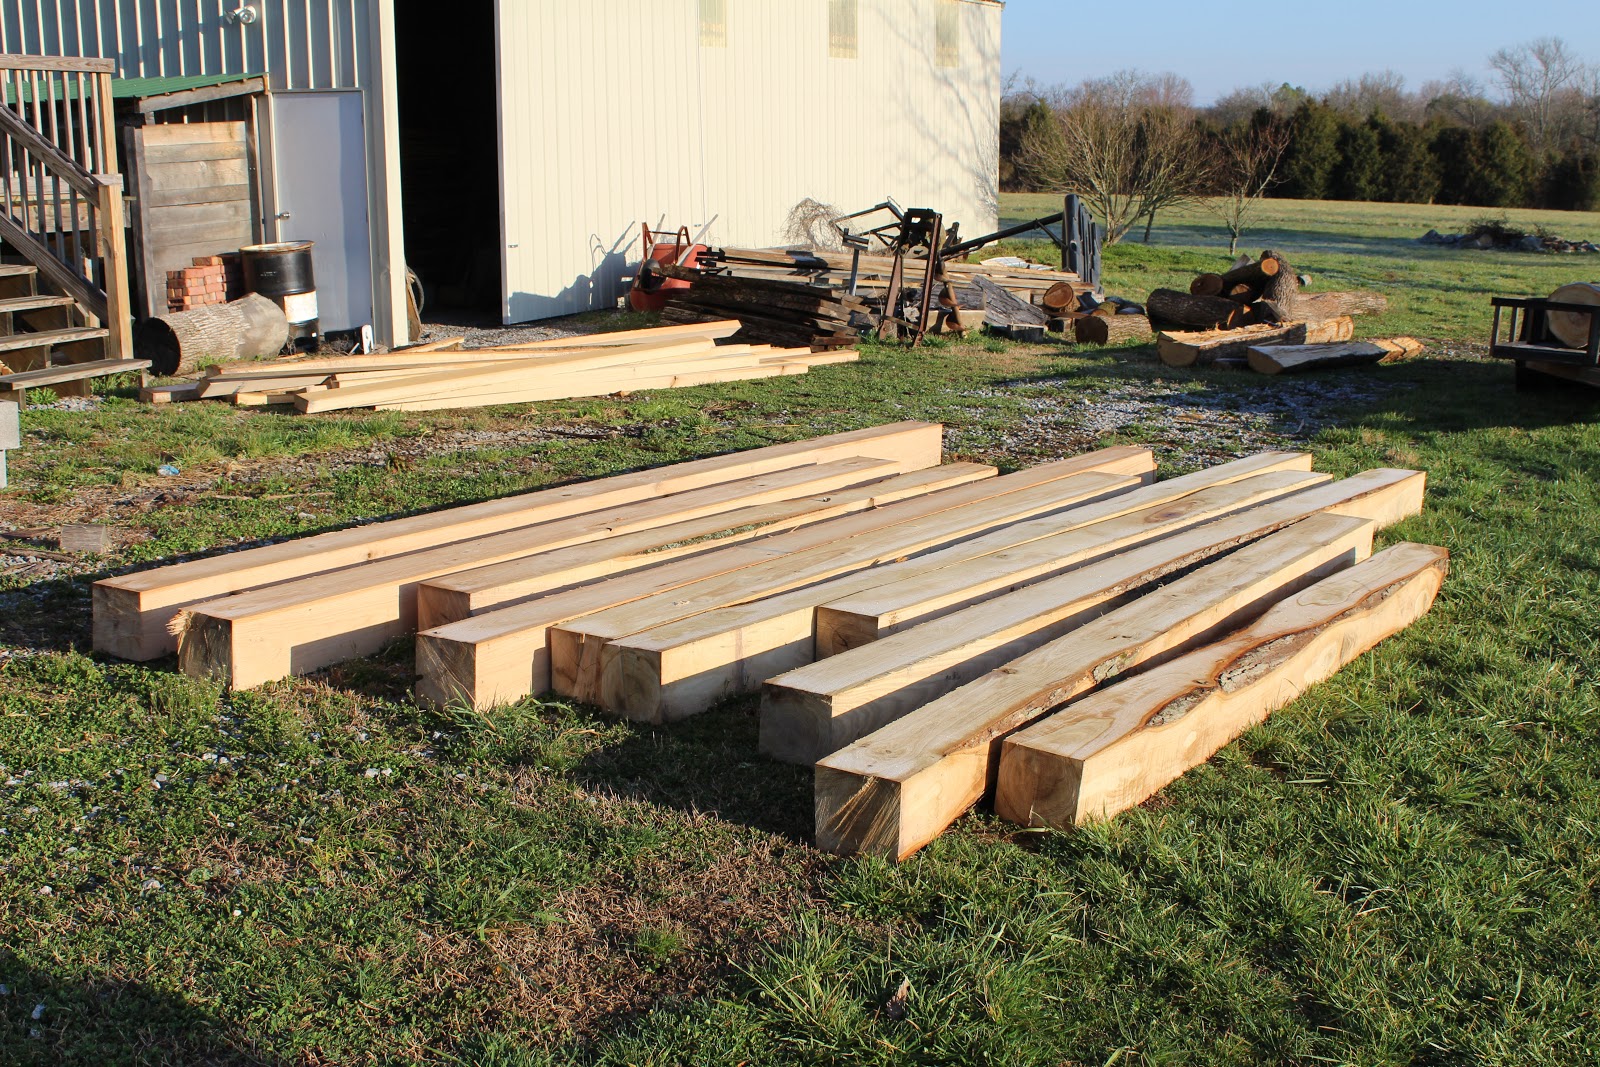
Well, the garden tool shed has begun. Last week Bill and I cut most of the frame from white and red oak. I really enjoy cutting these on the mill and they cut really fast. 
I loaded all that my trailer would carry. 
  At home I unloaded everything by tying to a power pole and dragging them off. 8 x 8 post which are 16 feet long can weigh as much as 450 pounds when green. My challenge is how to move these around the yard. Back in 2009 when I built my shop I used a John Deere tractor with a front end loader. I no longer have access to this luxury.
 My answer came from our swing set frame and a carpet dolly. With the aid of a chain hoist, moving these beams was a piece of cake.
 Who needs a tractor?
  I was a carpet installer in high school and my old boss is my next door neighbor's dad. A quick phone call and I was re-united with the original carpet dolly I used 26 years ago. I guess you know my age now.
 I moved the sill plates in front of the shop to start the work. I am using white oak for the sills and red oak for everything above grade. I still need to finish the dry stone foundation which this shed will rest. If I failed to mention I will be doing Jack Sobon's garden tool shed from his book. This will be a 12 x 16 shed with an 8' deep front porch. Stay tuned.
 My wonderful hens have really taken to the new coop. I have 7 birds laying 7 eggs per day. Good to know they are all doing their part. Send me your egg recipes.

Saturday, March 16, 2013

Harvesting Timber Frame Logs

Here is a quick video from Bill Nelson and myself harvesting the logs for the garden tool shed I will be building later this spring. It is really an excuse to use my new HD camera and figure out how to edit. I have a lot to learn. Enjoy.


Tuesday, March 12, 2013

No...It Can't be Sprayed

 I have been busy lately with lots of various tasks. During these events I have been adding layers of milk paint to this settee. From red to black. Two coats of each. It has been a slow process and I have pulled out all the patience I have to keep going. Someone asked if it could be sprayed. Maybe, but not by me. I tried to spray shellac on a chair years ago with not so good results. Too many dry spots and I could imagine milk paint would be worse. What keeps me focused is the fact that all the time spent to make this piece successful relies on how well I execute the finish. It takes me about 3 hours for one coat with coffee breaks. It's just time, and if I skip a coat because I am lazy I'll surely regret it and wish I had not been in a hurry. Can you tell I am tired of painting this thing? Tomorrow one last coat of black.

  I did find time to open up the new white oak log to see if my money was well spent.
SCORE! Lets hope it bends as good as it looks. It did have some minor twist but not a problem. Isn't wood awesome?
 That's as straight as it comes and this is the second cut log from this tree. Wish I had the butt log.
 It has been a year since I cut this very clear and nice quarter sawn poplar log. Can anybody tell what I am going to make with these boards? Does the book give any clues?

I just received some new toys in the mail. This is the first time I have ordered tools from Patrick Leach and I have to say they are top notch. I asked for good user tools (I am not a collector) and he sent me these beauties. A 605 Stanley and 4 1/2 smoother. These will be a big part of the project with the quarter sawn poplar. More to come.


Thursday, March 7, 2013

The Egg Machine

Spring is near and it always brings new challenges. I have adopted 7 hens from my neighbor who just moved down to Mississippi. Naturally being a furniture maker I built my own chicken coop or "chicken tractor" as I have heard it called. I wanted something portable to move around the yard and keep the chickens in fresh grass. If all goes as planned I should get about 3 dozen eggs per week. 
 It has 3 egg laying boxes. The pine shavings are from windsor chair seats. I use to throw these shavings away but what a perfect use. I built this thing like a tank to protect my girls. We have lots of coyotes around here. I saw three in the backyard last week.
 Today I added the chickens to the coop and they seemed to like the new environment. My other neighbors raise chickens and have helped me through this project. My first egg was laid in the grass. Oh well, you can lead a horse to water.......
 On the back I have my tools to clean out the roost area. Later this spring I'll get some fencing so these hens can run free during the day.
 Back to the settee which has been delayed from the chicken coop. I carved out the crest rail. I scrape the volutes with a piece of bandsaw blade ground to a profile to fit. Very effective tool which can be adapted to any shape.
 After the carving complete I installed the crest and spent the afternoon doing the final clean-up for painting.
 Here it is this afternoon ready for paint. I carve the crest out of walnut which is easy to carve and shape.
 Here is my setup to paint. Usually with chairs I flip them up side down to paint but this is not so easy here so I will paint it in this position for every coat. Tomorrow I will start this process. Black over red.
 My new book arrived in the mail this week. Very informative book on wood properties from Christian Becksvoort called "With the Grain". I love the quality of the books that come from "Lost Art Press". A must have book for any woodworking library.
 Last week I had to make a trip to my log yard in Scottsville, Kentucky for a white oak log. I had my camera along and took these shots.
 The white oak selection was slim. They had just sold a bunch and these were left over. I got the one in the middle. I ended up with two logs before leaving.
 It was hard to leave without this gorgeous cherry log. Maybe next time.
 Here is one of the white oaks I ended up with. Waiting to be split you never know what's inside. I will know soon.
Sunday, February 24, 2013

Settee Part 4-Spindles, Spindles, Spindles

My wife is a second grade school teacher of which I look up to with the utmost respect. She has such patience with her students on a daily basis. I like to think I have lots of patience when it comes to teaching chairs but then I realize my few students really enjoy woodworking and we have fun as we make a chair. I guess if I had a room full of 8 year olds who really didn't want to be there then my patience would be tested. I did test my patience to finish fitting all 45 spindles for this settee. After a while you can get into a rhythm. I guess I passed the test. 
 Here is my set-up to ride the horse and fit each spindle to its own hole in the arm. I taper the arm holes to match the spindle. No glue on this joint just a wedged fit.
 I cannot emphasize enough about being organized here. I like to use a sharpie and number each spindle on the bottom as I finish it. I pencil numbers underneath the arm as well as the seat holes.
 Here you can see I have laid out all the spindles in order, warm water, warmed hide glue, brush and a hammer. These spindles are fresh out of the kiln. Ready for glue-up.
 I move at a steady pace and glue each spindle in its corresponding permanent home. No reason to rush but I realize my dry spindles are soaking up the humidity as I go. Some spindles have taken on some crazy bent shapes but no problem with this style settee
 Next goes on the arm which I only glue the short spindles and arm post. This is where I hope there are no thick spindles I forgot. All went well.
 Then I weave the back through the spindles and drill the back. Some last final checks of the 3/8'' spindle diameter and the arm is tapped down in place. Lots of wedges here.
 The shop as seen this afternoon after the glue-up. All I have to do now is carve a crest rail and of coarse about 4 days of painting. More patience! Stay tune for the last settee installment later this week(hopefully)
 Here is Larry after completing his rocker last week. Not bad for his first chair. Great job Larry.

Sunday, February 17, 2013

Classic Settee Part 3

Now I have the seat completely carved and ready for the undercarriage. I will finish scraping the seat after the legs have been installed. 
  Here is a shot of all the stretchers after they have been drilled and the tenoned sized on the ends. Fresh out of the kiln.
 The first operation in glue up is the stretcher assembly. So far so good.
 Everything found a place so all I have to do is saw kerfs in the leg tenons for wedges.
 And marry the legs to the seat. I hope this is a long happy marriage. Careful measurements to level everything then cut the legs to length. Looks like my workbench could have been just a bit longer.
 Here you can see I have drilled the arm to fit the arm posts. This took a little time to be sure things were right. I don't want to bend another arm.
 The arm lines up perfectly and true center came out dead center. Lucky day! Next you can see how I drill the many holes through the arm into the seat. Now I will start the very long process of sizing all the dry spindles. Won't be long now.
 My good friends Ziggy and April had to leave to go back home in Missouri today. I really enjoyed having them here and hope they learned a few things they can use back home. This is a bowl April was carving by hand to use with dough.
 I like this curved bench she made with the steam bent stretcher. This was sawn from a curved branch of a local walnut tree. Great job you two, see you down the road, stay sharp!