Saturday, December 3, 2011

The Next Steps

I have been wanting to finish the loft on the other side of the shop for some time. The other loft has an attic pull down and has proven very difficult to carry things up or down so a real set of stairs is a must. This is the last empty corner big enough for the steps. No windows and just enough room over the back door. I had to move the library but there will be plenty of room upstairs later for it.
I dusted off the old chain mortiser to create the pockets for the floor joist. 3 x 6 beams of red oak (from the same log as the other side loft) worked great for the floor. It's always fun working with the timber frame tools. It's such a simple way to build and very strong. Notice the strong checking that has occured since raising the frame back in 2009. They claim this does not affect strength.
Here is a shot of all the floor joist mortised in place. I connected the two lofts with a walk way so I don't have to use the attic stairs ever again.
The stairs are all red oak from a tree I cut last spring. The stairs work great but watch your head on that brace on your way up. Soon I will complete the railings and flooring up stairs. I might put the band saw up there along with a place to paint chairs and of coarse a lot of storage. I have almost doubled the size of the shop. Now I need to get back to making some chairs.

Sunday, October 30, 2011

Half the Size Twice the Fun


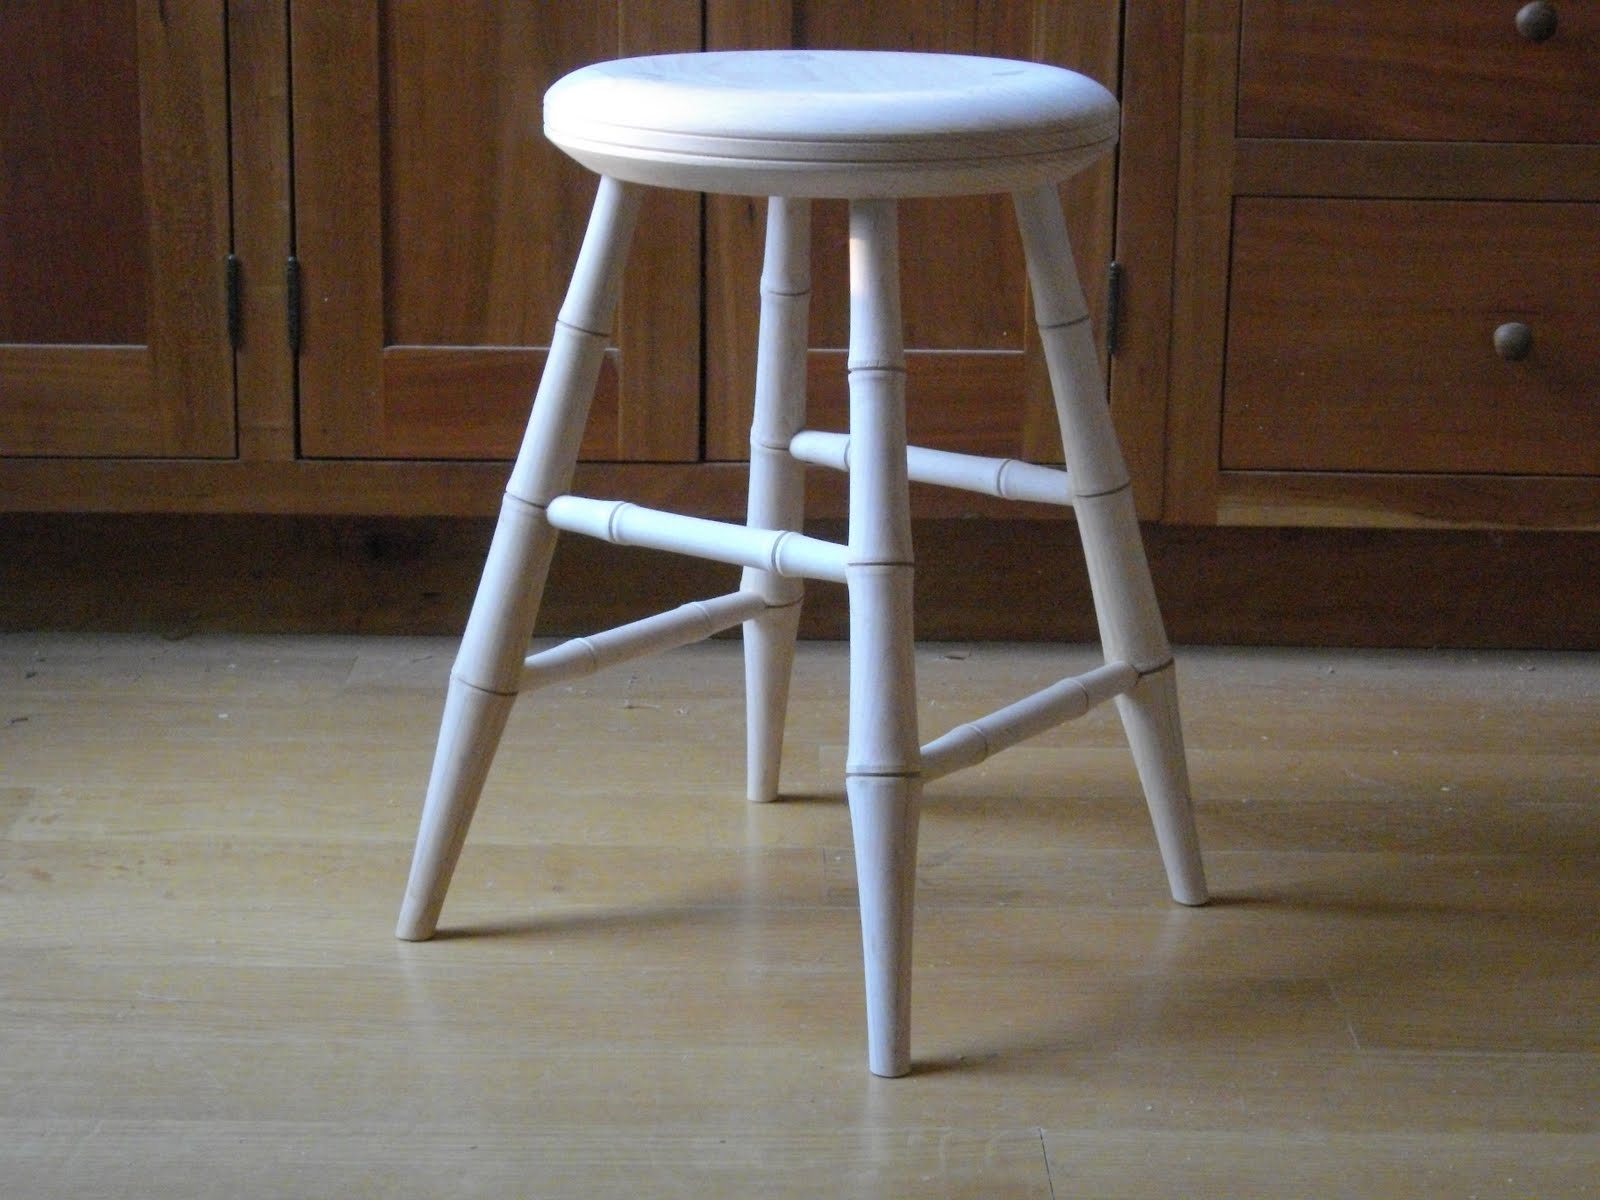
I have been toying around lately with the idea of small size chairs. I decided on a sack back at 50% of adult size. My kid size chairs are 2/3rds the size of adult so this makes this chair too small for human use. Great for dolls maybe or just art to sit on a table or hang from the ceiling. The chair is scaled exactly from an adult size. Every measurement is divided by 2. The joinery is all the same except I used straight tenons instead of tapered tenons. I even used the same tools on each process including the turnings. It is a great exercise for detail work and using hand tools. The top of the spindles are wedged at 3/16ths of an inch. No room for sloppy joinery here. The steam bending was easy and only took 25 minutes in the steamer. Overall I like the result and look forward to trying several different styles. I will take these to the spring TACA craft fair in Nashville to see if they sale. Those fancy dolls need somewhere to rest.
Recently I had Matt here for a Comb Back rocker class. This is the first time I have ever had a student complete the chair of this degree of difficulty in 5 days. This is the first windsor he has built which he completed for his wife who is due their first child in November. Very impressive even if he had stayed late but done in 8 hour days. Matt, you are going to be a great dad.

Thursday, September 1, 2011

Road Trip


Once again I have been procrastinating with the blog. Busy? Yes. But I really have no good excuse but being so focused on other things.
Speaking of focus, Jake Wiens stopped by the shop to shed some light on photographing chairs. We used the youth high chair as a specimen. Below are two examples of his work. He gave me some good pointers on how to use a cheap flash and poster boards positioned above the chair to bounce light in the right places. He took these photos which brought out the detail better than I normally get. Jake works as a professional videographer and photographer for promotional programs out of California. Good job Jake.

Recently I went to Jonesboro to meet Curtis Buchanan to shop the log yard for sugar maple. He was so kind to give of his time like this. He knows how to find the really good stuff and it's only 20 minutes from his shop. We found 2 perfect logs and one slightly stained but still very straight for turning stock. I love the shot of his shop in the background. It looks as if it grew there.
This is what I brought home. You can see the flared out stump end sections I cut off. I give these to bowl turners.
Below you can see how Curtis lays out the log to split with the froe. No doubt this is the best way to follow the grain but I use another method using the saw mill. I don't think Curtis likes my process but let me plead my case.
First I cut the log into two 6 or 7 foot lengths and mount on the mill. Then simply measure and level the piths with shims on each end of the log. This method only works this well with really straight logs so only buy the best.
I saw the boards into heavy 8/4 or 9/4 thickness.
Then I chop saw the boards to length according to what I need ( legs, arms, stretchers. etc.) and carefully follow the grain with a straight edge to band saw the individual turning blanks. Don't forget to seal the end grain or you will find yourself in "Checkville".
Then simply round them all and stack to air dry. You can see the grain running true through the piece. Are they all a 100% perfect? No but those who don't make the chair will create lots of heat. Sometimes I get blanks at the butt end of the log with flare-out and cross grain but I still end up with hundreds of turning blanks really fast. If I didn't have to supply so many chair classes then I would just rive them like I do the oak for bending and spindles. But I have hundreds of turnings to complete so this will be my method. Sorry Curtis.

Saturday, June 25, 2011

A Simple Turning Exercise

Here is a basic stool you can make in a couple days. Very simple and all done on the lathe. Face plate and bowl turners should love this.

I start with a 1 3/4 to 1 7/8 inch thick bandsawn blank that is usually around 11-12 inches in diameter. My Oneway 1224 lathe only allows me to turn 12'' in diameter. I find that anything bigger starts to get in the way of the back of my legs while sitting. You can see the profile below. I also find not to dish out the seat too deep. There is not a front or back and dished out too deep is uncomfortable. I think this one is only 5/8'' deep, heavily rounded on the edges and chamfered below to give a delicate appearance.


The layout after turning the seat could not be more simple. Draw a line on the bottom centered and following the grain. Draw the second line centered and perpindicular to the first. These are the sight lines. I usually find 14 degrees to work well on these stools.

After drilling the leg holes with a straight 5/8'' bit I taper them with the 6 degree reamer. Below you can see the bamboo style leg I used for this stool but use your imagination to create any style you want. Remember to add 2'' to the length of your leg blank to whatever seat height you want. After drying the leg tenons and stretchers assemble just like any other windsor chair undercarriage. I love these stools for shop use at the bench or while sitting to fine tune another chair. It helps to have a few at different heights but mostly I use 24'' and 18''. They are also wonderful to play around with paint finishes since they are so fast to make. They make wonderful gifts as well. Have fun!


Lately I have been busy with gardening and Logan's baseball games. I think we are 2 and 3 right now. I also managed to lock up our computer loading pictures and have now been reduced to using this slower lap top so the blog has suffered.

Below you can see the progress of the corn. I hope I can keep the deer away. Last year they totaly mangled my second crop.


Here is a shot of the second garden with potatoes, onions, cucumbers, tomatoes, squash, and watermelon. The sunflowers popped up from last year. This garden keeps my mind clear from too much time in the shop. Well, time to harvest some cucumbers for some fine sower dill pickles.

Thursday, June 2, 2011

Big Boy

Every once in a while I'll get lucky finding great wood. This old walnut tree gave up the battle after a storm several weeks ago. The tree from a distance looked small and so I drove past it without too much notice. One day I decided to actually get out and look at the tree. It was a monster. It was also lying in a creek and very hard to get to.

Owning a sawmill keeps me constantly hunting for trees and allows me to take advantage of fallen trees that nobody else seems to want. It also allows me to meet new people one of which has the big Holland you see below. Johnny Watson was very kind to extract this tree to the bank of the creek so I could pull the mill next to it. In exchange I will saw a white oak for Johnny that he owns which is over 150 years old.

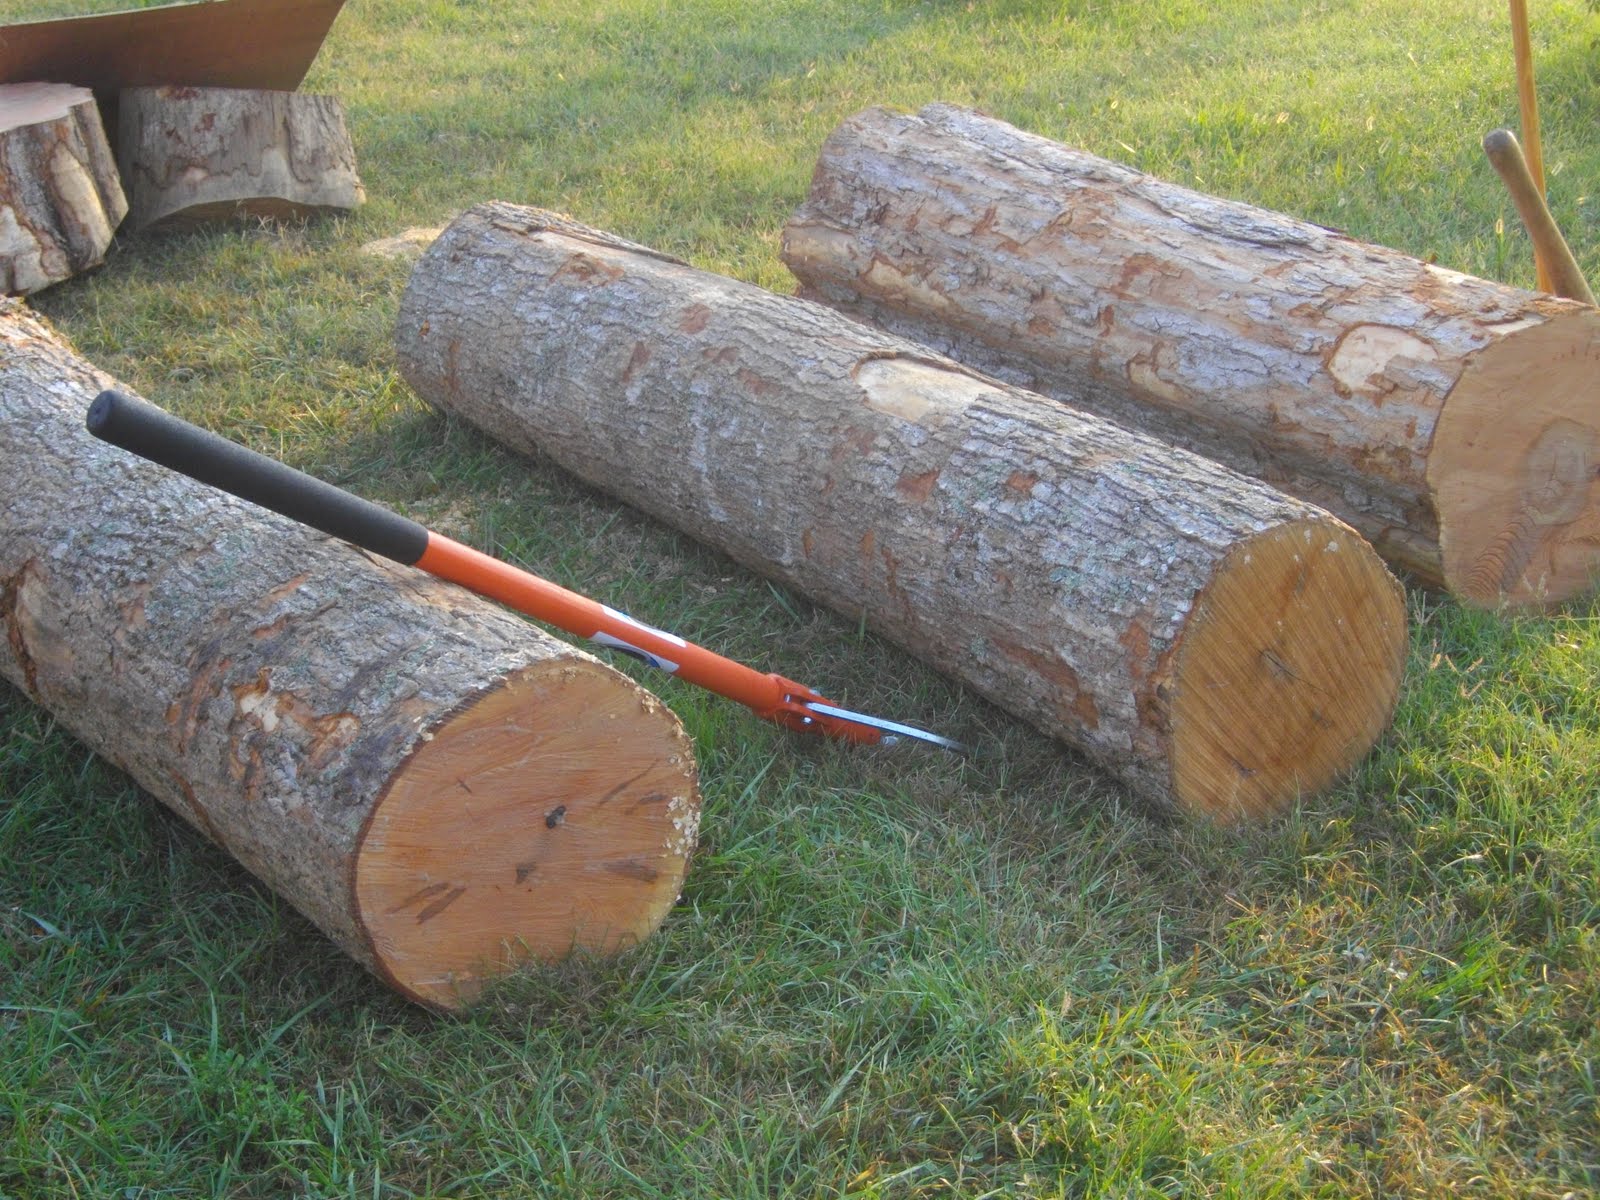
As you can see the sap line in this walnut was very small. The log was about 3 feet in diameter and had a 10' clear section. It also had lots of figured crotches that were some of the longest I have ever cut.
Bob and Pete were there to help unload the 22 inch wide boards as I cut them. I could see them drooling over the stuff even though they were worn out from lifting these things. This tree tested all of us but in the end I think we won. It will be hard to wait a year for these boards to dry. The tree provided well over 1000 bd ft of prime stuff.


Recently I had Anthony Watts here at the shop learning to build a settee. He is coming over several weekends around his work schedule to get it done. You can see below Anthony smiling while legging up the undercarriage. I must be doing something right.
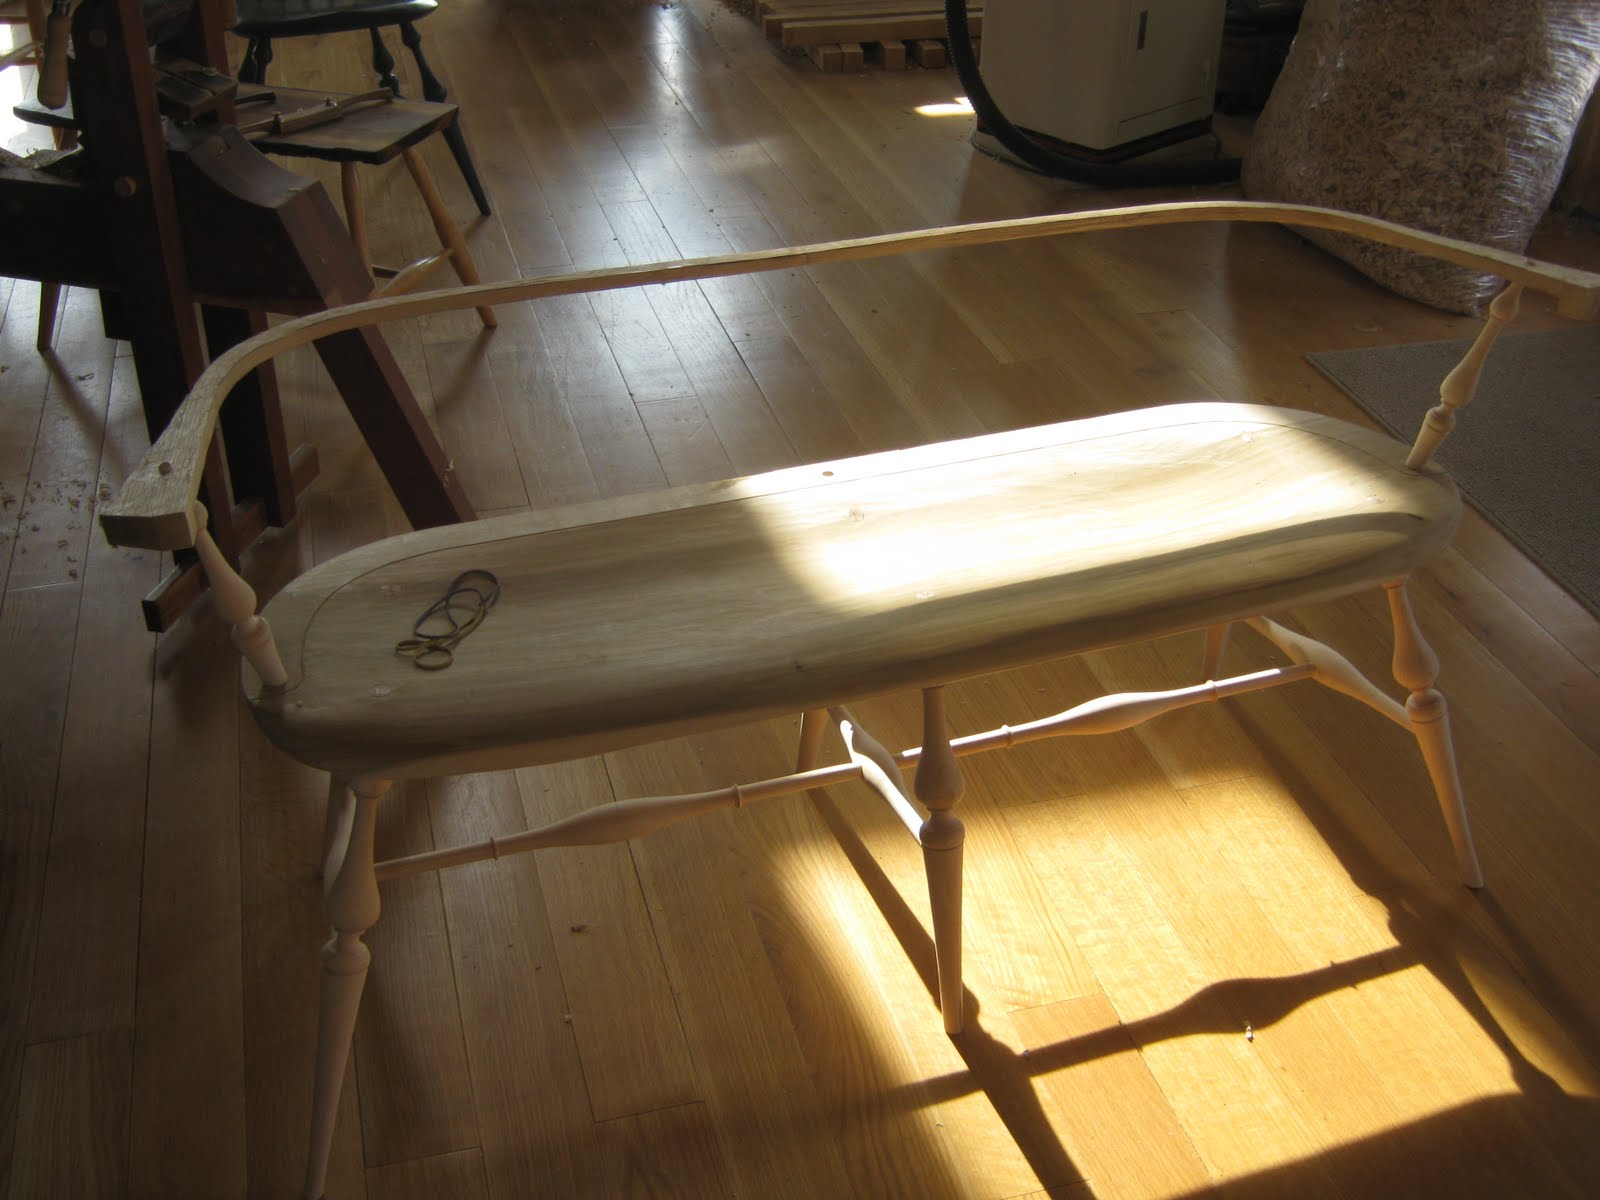
Anthony is doing a fantastic job and seemed to really like the laser drilling method. All of his stretchers measured evenly either side of center and look perfect. He will return soon to finish the settee. I think this will be a birthday present for his wife. Happy birthday Betsy!


Wednesday, May 18, 2011

Facelift

Finally, a chance to blog about a few of the many things I have been doing lately. First and foremost I am glad to show the new color of the shop "olive grey" from Porter Paints. I am sure my neigbors are pleased to be rid of the big yellow shop. The Hardie plank siding says to paint within 90 days to prevent voiding the warranty. Oh well, 90 days, 2 years, what's the difference? At least I gott'er done. I also added the front porch roof which gave the best atmosphere inside the shop thus far. I wish I had done this a long time ago. There is still lots of loose ends to tie up but I'm headed in the right direction.

Another project that had been lying around was this monster red oak log someone brought me to cut. (thanks Todd). Wow, the picture does not do it justice but this was the biggest log to date that I have sawn on the mill. 44'' at the base tapering to 36''. I wish this had been butternut.


Last weekend was the TACA craft fair in Nashville. I finished a rocker for the show. I had the chance to use Pete Galbert's method to rout the rocker slots in the legs. The up spiral bit although expensive(and noisey) worked very well.


As you can see below the joint is flawless and cleaner than the ones I use to cut by hand. I made the cut in one pass and the bit did fine. Not bad for hard maple. The chair, which uses a parabola rocker design, was a big hit at the show. People seemed to think that the chair was very comfortable.I received several orders.


Logan has been doing well at guitar practice. His teacher, Kevin at Sam Ash Music, is quite amazing with anything with strings. He has great patience with Logan and has taught him things that I never could. I get to sit through his practices and the biggest key that Kevin pushes is repeating the rif over and over. Logan has learned Sweet Child of Mine, Black Dog, and Stairway to Heaven. I guess my versions of John Denver were not enough for Logan. Anyway, what fun it is.


Friday, April 1, 2011

Berea Bound

Well, we did it. The turnings are done. Below you see Pete Wiens and myself with everything done. Pete did half of the double bobbin legs. Pete is an accomplished turner who just finished a comb back class and decided to help me over this mountain. Thanks Pete!
This is what happens after you have completed over 200 turnings in one week. Your brain decides to do something useless but artisitc. Besides, when will I have so many turnings in one place again.

Everything is ready to go to Berea, Ky. to help with Pete Galbert's class at Kelly Mehler's. This has been great fun turning and splitting chair parts for 26 chairs. I look forward to the 2 classes we are doing and the awesome food Kelly provides. I have said it before, if you haven't been to one of Kelly Mehler's classes you are missing a fantastic opportunity. See everyone in a few weeks!


Tuesday, March 29, 2011

Oops!

No, this is not my car. I don't even know the people who live here but I bet this guy wished he had parked in the garage. Several weeks ago a severe downburst of straight line winds blew through the Indian Lake area of our town. This shows the power of falling timber. I didn't get to aquire the walnut from this yard but it was very nice. There were more trees than I could ever imagine trying to harvest. I am only one man with limited equipment. I also simply do not have the time to be gathering trees, although.......


With some help from Pete Wiens and Bob Peterson we did manage to gather a few. That's me on the left only wishing I was able to cut the beech tree you see behind us. This tree was near 200 years old and 4 feet across. Pete(far right) wanted a quarter section to turn on his lathe so I tried to cut a piece for him. The tree company people felt sorry for my little 20'' Sthil chainsaw and showed me up with his monster saw which melted through this log without hesitation. He grinned the whole time he was cutting. He knew he had showed me up. I'd like to see him make a chair!


Here is the result from the beech tree. Remember, this is only a quarter of the log.I cannot wait to see how Pete will chuck this on his lathe. Good luck.


Here is a cherry tree I cut up into turning blanks for chair parts. I also sawed a hickory and maple for firewood. The best tree we found was a butternut and of coarse we sawed into seat blanks.


For those of you coming to the chair class at Kelly Mehler's here is Bill Nelson helping me harvest some white oak for your chairs. Bill recently had hip replacement surgery. What was he thinking?

I like being able to select the trees while I can see them standing. We also cut some post and rafters for the front porch of my shop. This will be my next project after returning from Kelly's school mid April.
I like this picture showing all the wood I have been collecting the past month. On the trailor the front porch wood, the chair logs already unloaded on the ground(by the way they split very well), and in the back ground tons of firewood for next winter.

I have had lots of students at the shop during all this and one more class to teach right before I leave for Berea to help Pete Galbert. I finished the last of the turnings tonight and will post some pictures later this week. Time for a nap!

Sunday, February 13, 2011

Preparing for Class


Once again I have the honor of assisting Peter Galbert with the chair class at Kelly Mehler's school this spring in Berea Kentucky. We had a great class last year and the responce to this years class prompted Kelly to add another class. So we have 2 weeks and 2 different sets of students. Pete is flying in from New York so I'll be responsible for all the materials. No pressure there, right?

I've aquired a nice oak log for spindles and a nice sugar maple for all the turnings. I sawed the maple into 5 foot lengths and then sliced them up into 8/4 on the sawmill following the grain as close as I could.


Then I brought the 8/4 slabs into the shop and cut to length and ripped into billets on the bandsaw. It's funny how you cut a round tree into squares only to round them up again.I sealed the ends with anchorseal wax to prevent cracks. As you can see below I have a lot of work ahead of me rounding and turning enough stock for about 20 chairs. After rounding the blanks they must dry for several weeks before I can turn the legs, stretchers, and back posts. I'll get some pics of this operation later.

Logan worked on one of his favorite projects of splitting wood. My stove only accepts 12" lengths of firewood so the short sections of red oak blow apart with relative ease. I always seem to have scraps of logs to split up. Nothing goes to waste. You can see the nice stack of wood Logan has already split. Maybe this will get him ready for baseball next season.


I hope by now some of you have tried the laser method of drilling angles. I wanted to show Pete Wiens below drilling a stool leg for box stretchers. With only one of the lasers set up shooting down the center of the leg(hard to see the laser in the photo) it gives you the true center to start drilling. The laser is also set 90 degrees to the bench (checked with a square of coarse) which shoots a beam up the drill so you can drill perfect 90 degrees. I still use the mirror for the the other angle which is easier to see. The stools that Pete Wiens built were drilled so perfect using the lasers that the footprints of each stool matched perfectly. Please let me know if you try the laser method and what you think of its accuracy and simplicity.


Friday, February 4, 2011

Laser Reaming

Sometimes I like to bounce new ideas off of students. Sometimes I get a blank stare or "yea, that's cool", but yesterday after showing Pete Wiens how to drill and ream his stool seat with sight lines and mirrors it hit me that I needed something different. The problem is getting someone who isn't use to looking at sight lines and bevel guages to ream at the proper geometry to get all the legs really close to what they should be. Up til now "really close" was the best I could hope for. All I said to Pete was "what if we had lasers?", and today we have what you see below. With this set up anyone can ream the tapered holes for the legs spot on. It gives the students more confidence than I could ever imagine and it really sets up in seconds. If it were not simple then believe me, I would not fool with it.
It works like this. Go to the local home improvement store and pick up two cheap $15 B&D line lasers. They have a small magnet on the bottom. We built the base out of scrap wood with a heavy hardwood bottom for stability. It's good to have rubber glued under the base so they won't slide around on the bench. The dowel makes it adjustable for easy setup. The laser sits magnetized on a metal nut imbedded in the base.
Now on the bottom of your seat blank after you have drilled the straight holes from above the usual way, draw a perpindicular line across the hole to the sight line. Set up one of the lasers tilted to the drilling angle and sighting down the perpindicular line. The other laser will be adjusted to 90 degrees to the seeat blank and sighting straight down the sight line. Stay with me now.
Now all you have to do is start reaming keeping the crosshair of the lasers right on the top point of the reamer. That's it! It comes out perfect and I have not found a flaw yet.
A couple things to remember. Never look directly into a laser. This set up with this brand of lasers keeps the line of light lower than eye level. Also it helps to turn off the lights above your workbench. I have windows all around and still had no problem seeing the laser lines. Also turn the top of your tapered reamer slightly concave so the laser will fill in to the top of the reamer. I hope this will shead some light on reaming perfect angles. Good luck.