Saturday, May 31, 2014

Forging Ahead-Lessons From a Teenage Son


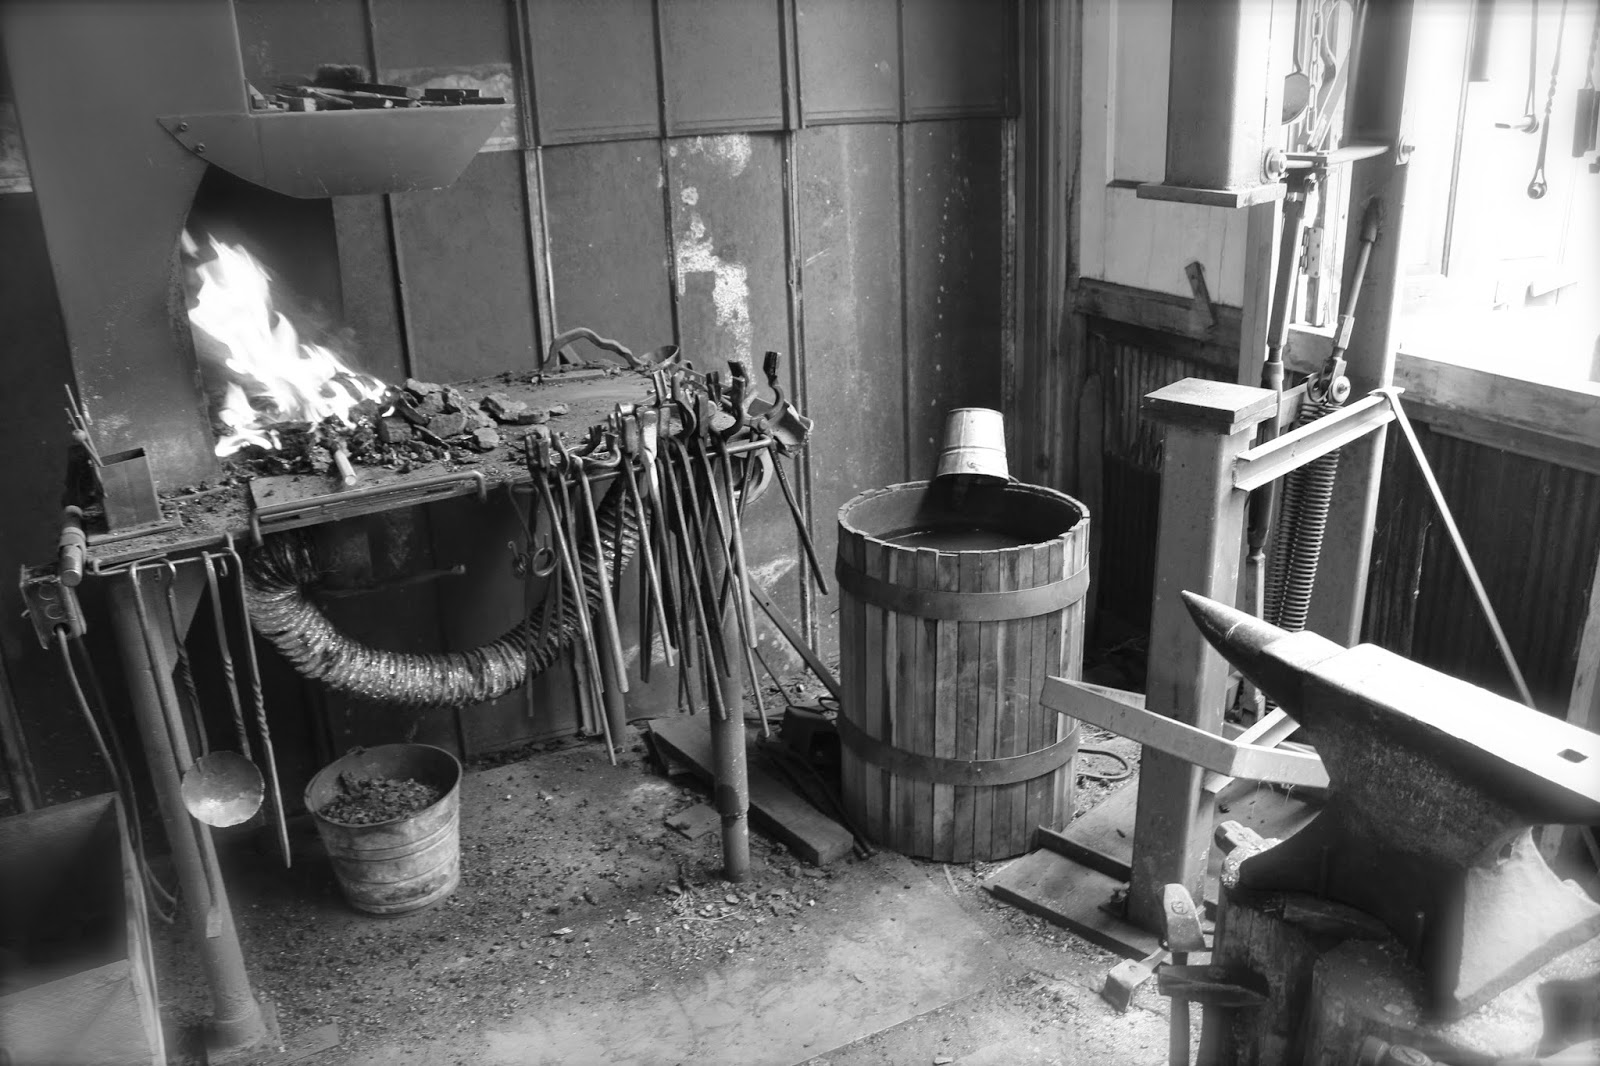
A while back my son Logan came home from a bike ride with a friend of his and a bucket of railroad spikes. My only thought was "don't tell your mother you were walking around the railroad tracks". Who hasn't done that as a kid. Anyway, Logan had this big idea of making knives out of them. His drive was his friend and probably you-tube. He mentioned it several times but I did not take him serious until I saw my pole barn. Logan set it all up as a forge. He even blocked in my lawn mower so I new what we were doing today. I really was impressed with how efficient he set it up. I particularly like the gas forge on blocks. I hooked up the propane and we were ready.

 Now everything I have read about RR spikes is that they don't have enough carbon to hold an edge. But this is an exercise for Logan to do something that has been on his mind for a long time and I think he will learn a lot.
 The spike goes in and I think we were both giddy with excitement not really knowing what may occur.
 As Logan begins to pound the metal I could see how much he enjoyed seeing it begin to take shape.
 Many trips back to the heat before finally quenching in water. We were having a good time and I was so glad to have Logan away from the video games for a change.
 Bam! We have a knife. No reason to heat treat since the lack of carbon in the RR spike would not  make any difference. We semi sharpened and polished her up. Logan has taught me a lot today....what next?
 All this fun got me thinking about the O1 tool steel that I had. Naturally I had to try and make a drawknife no matter how crude it might be.
 Bam! We now have a drawknife. This thing actually took an incredible edge and cuts great. Might even be worth fashioning some handles. The drawsharp worked great getting her sharp in short order. I may have to do this again but make a scorp next..............
 Logan decided to attach the hammers to the stump, way cool Logan. He is really getting into this.
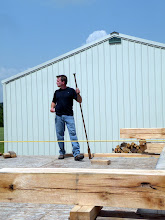
 Well as we say here in Music City "the proof is in the pickin" and the new chair makers bench has been broken in carving the first seat. I could not be happier. The only problem was where to place it in the shop.
 I decided perpendicular to the other bench. Plenty of room to work around each bench and still close to the tool cabinet. Tomorrow I'll take the day off then Monday hit the ground running hard getting some chairs out the door.

Wednesday, May 28, 2014

Short and Sweet (a chairmakers bench)

Well, after a few hours work the first dedicated chair makers bench in Sumner county is complete. First and foremost I think any bench should be massive, heavy, thick, and won't dance across the shop in use. The Roubo style fits that bill perfectly. But beyond that a chair makers bench should be slightly wider (26 1/2'') to handle the rake and splay of the legs. Not too wide since carving a seat involves 180 degrees of movement around the seat while carving. That is why the top is shorter (4') in length. 

 The leg vise is very powerful for holding seat blanks in place. I also made the chop 9'' wide for more purchase on the seat and also for the leg jig when drilling the undercarriage assembly. The vise is closer to the end of the bench for easy carving on end grain. The Benchcrafted vise works just as sweet as the video you see on their website.
 I have four of the hold fasts ready for use around the bench. These are a must for holding the seats in place while carving. The top is 4'' thick and I drilled a 1 1/4''counterbore underneath every hold fast hole leaving only 2 3/4 thick material. I have had problems in the past with them not holding in thicker tops. This always solves the problem. Matthew O'Neill also gave me a good tip the other day of using a center punch on the shaft of the hold fast to help grip the hole. Good stuff.
 The base has the same shelf like my other bench using ship lapped boards which float on cleats.
 The biggest improvement was eliminating the tail vise getting all the dog holes out of the way of the chair legs. I also moved the hold fast holes closer toward center for the same reason. I like the split top design without a tool tray but open on each end to use clamps to hold chairs in place after legging up. The gap is 1 3/4'' wide to accommodate the style of clamps I use.
Overall there is not really a lot of difference other than just tweaking a few things that kinda bugged me about the other bench.There are things that will still work better on the other style bench so it's good to have both. Especially when I have four students at one time. You all let me know what you think. Happy chair making!

Sunday, May 25, 2014

The Local Blacksmith


Remember the good ole days when every town in America had a blacksmith shop. Yea, I don't either and why is that? I guess with modernization and faster ways of doing things we just don't slow down and make something with our hands from raw material like we use to. Enter Anthony Martin, owner of Red Tail Forge. This is why I love my job because it takes me places in search of high quality tools. The ones you don't find in fancy warehouses. The simple shop of a blacksmith. You know I like simple but there is a lot to know when working metal and it's cool to watch a master at work.

 Anthony, like most blacksmiths, makes a lot of his own tools. You can see the wonderful array of holding devices below that become an extension of his hands to hold the work while shaping and bending. Unlike woodworking Anthony can't feel the metal in his hands while working but if a mistake is made he can simply heat the material back up and start again. It's much harder than he makes it look and I was very jealous of his abilities.
 The heart of every good blacksmith shop is the anvil. This is a 19th century version from England which has the original owner's signature from the 1800's.
 Anthony was very gracious to spend his Saturday making me some hold fast for my new chair makers bench. He started with 11/16th round stock 18'' long and heated up the end.
 Stock this big is then pounded using the antique power hammer. A very impressive machine that shows no mercy. He squares the ends which also stretches them a little lengthwise.
 He follows with hand hammering the point to begin the start of the leaf pattern. Then he hammers out the leaf and veins, bends the upper section to the correct geometry all while constantly re-heating the metal. Anthony moves with a purpose and operates like a well oiled machine. I guess you can say he had many irons in the fire, literally.
 After final shaping he hangs them to air cool. You don't quench these since they have to be pounded during use and must flex to hold the work.
 Several hours later we had six hold fasts ready to work. All tested great and each had there own personality. Just like I wanted. Anthony far exceeded my expectations and I can't wait to show you the new chair makers bench with these new hold fasts. The bench is almost complete so stay tuned for the results.

Tuesday, May 20, 2014

Hold Fast With Style


One of the simplest tools I know is the hold fast. An invaluable tool for holding wood to a workbench.  I have seen many of these over the years and not all work correctly. The really good ones are forged from tool steel and can be hard to find. The new chair makers bench I am in the middle of building has made me realize the importance of finding a good hand made hold fast. 

In the past year I have been introduced to an incredible artist and blacksmith named Anthony Martin from Fairview, Tn. His company is called "Red Tail Forge" and he specializes in 18th century reproductions. 
I contacted Anthony and he has agreed to make the leaf type hold fast like the one you see below. Today I went and bought some 11/16th O1 tool steel and Saturday afternoon will see these transform into 6 hold fast. I'll post some pictures of the process later.
Upon digging in the pole barn through many piles of walnut I have discovered some clear 12/4  air -dried walnut that should laminate into a nice workbench top.
The leg stock has been machined and glued up.
I decided to make the top about 26 3/4'' wide. No tail vise and bench dogs on this bench. It will be two piece to allow for movement of the top. The top will also be only 4' long. The base will be 3' long. Tomorrow I will start assembly of the base and leg vise.

Friday, May 16, 2014

Chair Makers Bench Part 1

Well, I barely got use to the idea of making a new bench and the hardware from Benchcrafted shows up via UPS. Wow, that was fast. Everything looks great. The highest quality from an American company just makes me smile. Don't you wish everyone put this kind of effort in what they did.

I'll be making this bench from walnut. Not because it is the premier cabinet wood but I have been sawing this wood for years and have a ton of 8/4 material. Actually 3 tons. Maple was my first choice but what I have is still too green. I started with the leg stock. I'll laminate 8/4 pieces to make the legs 3 1/2'' thick. I have a class to teach this weekend so I'll pick back up on this Monday.

I finished up my sack back rocker which I taught 2 weeks ago. I managed to get bursitis in my right elbow while teaching this class so I quit the demos on this chair. It sucks getting old but it seems I have recovered. I think it was splitting the 8' logs that did it. My son Logan may be the answer to this problem. What 14 year old boy would not want to pound sledges into wedges splitting white oak. 

Tuesday, May 13, 2014

New Chair Maker's Workbench Coming Soon


I have just completed yet another chair making class last week. They made the classic sack back chair. Mark and Leon were extremely focused and finished really fast on Friday afternoon. The class was scheduled through Saturday but we didn't need the time. Their chairs came out very high quality and ready for finish. The class did make realize how important a new bench would be with multiple students. The timing of Jameel's new classic leg vise was perfect. I ordered one today and will start designing a smaller bench specifically for the chair maker. More to come.

Monday, May 12, 2014

Cumberland Furniture Guild Spring Meeting


The Cumberland Furniture Guild spring meeting will be held next weekend. The topic will be:

"MARKETING YOUR WORK"

A Panel Discussion
Terri Alea, Director of TACA, Alan Daigre of Alan Daigre Designs, Roger Gramm, owner of Just Plane Wood, and Chuck Brock, Chair maker/Multi-media Publisher will conduct a panel discussion on marketing your work. The meeting will be held  at Fort Houston, located at 500 Houston St, Nashville, TN 37203 on Saturday, May 17th. Please join us for a very informative and exciting discussion.

Sunday, May 4, 2014

New Old Table

Here are some studio shots taken by my good friend Fell Merwin. This table is made from 70 yeear old beech taken from my wife's grandfather's barn in Kentucky.
 Great character in those old boards that were very weathered and full of nail holes.
 I wish I had more of this wood. The finish is a shellac and glaze mix to slightly darken the surface. The knob is turned from ebony.
 Today my friend George Gruhn came by to pick up his new chair. I owe him all the credit for changing the way I carve my volutes on these chairs. George owns Gruhn Guitars in Nashville and knows a lot about Stradivarius violins and the perfect spiral on their volutes. Actually I think he wrote the bible on vintage guitars.
George got me to focus on the perfect spiral in nature that just feels right and looks great. I couldn't agree more. Thanks again George, I hope you like the chair.

Saturday, May 3, 2014

The Best Chair Class Ever!

It always makes me laugh when Kelly Mehler says "this is the best class ever" every time he has a woodworking class. Maybe that's true but I had two really great chair makers in class this week.Al and Bob drove hundreds of miles to get here but hit the ground running. The two rockers were almost complete by day five and they looked incredible.


 It's always good to have people with such good character and wonderful stories to hang out with all week. I can't believe they pay me to do this job. In the words of the great chair maker Pete Galbert it's called "livin the dream". Thanks again Al and Bob for a fun week and I can't wait to try boiled Dandy Lions. Next week I have another class teaching the sack back chair. I hope it is another "best class ever".