Now I have the seat completely carved and ready for the undercarriage. I will finish scraping the seat after the legs have been installed.
Here is a shot of all the stretchers after they have been drilled and the tenoned sized on the ends. Fresh out of the kiln.
The first operation in glue up is the stretcher assembly. So far so good.
Everything found a place so all I have to do is saw kerfs in the leg tenons for wedges.
And marry the legs to the seat. I hope this is a long happy marriage. Careful measurements to level everything then cut the legs to length. Looks like my workbench could have been just a bit longer.
Here you can see I have drilled the arm to fit the arm posts. This took a little time to be sure things were right. I don't want to bend another arm.
The arm lines up perfectly and true center came out dead center. Lucky day! Next you can see how I drill the many holes through the arm into the seat. Now I will start the very long process of sizing all the dry spindles. Won't be long now.
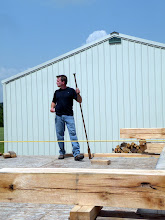
My good friends Ziggy and April had to leave to go back home in Missouri today. I really enjoyed having them here and hope they learned a few things they can use back home. This is a bowl April was carving by hand to use with dough.
I like this curved bench she made with the steam bent stretcher. This was sawn from a curved branch of a local walnut tree. Great job you two, see you down the road, stay sharp!


Beautiful work Greg! I thought doing the undercarriage on my Nanny Rocker was a challenge, this is like doing four at the same time. April's bench is really cool, it should be titled "Nakashima meets Windsor".
ReplyDeleteBeautiful series of pics.
ReplyDeleteVery crisp turnings Greg. Nice work indeed.
ReplyDeleteCheers
Glen
Thanks for all the nice comments.
ReplyDeleteGreg