Sunday, April 7, 2013

Cherry Onions-Nobody Wins

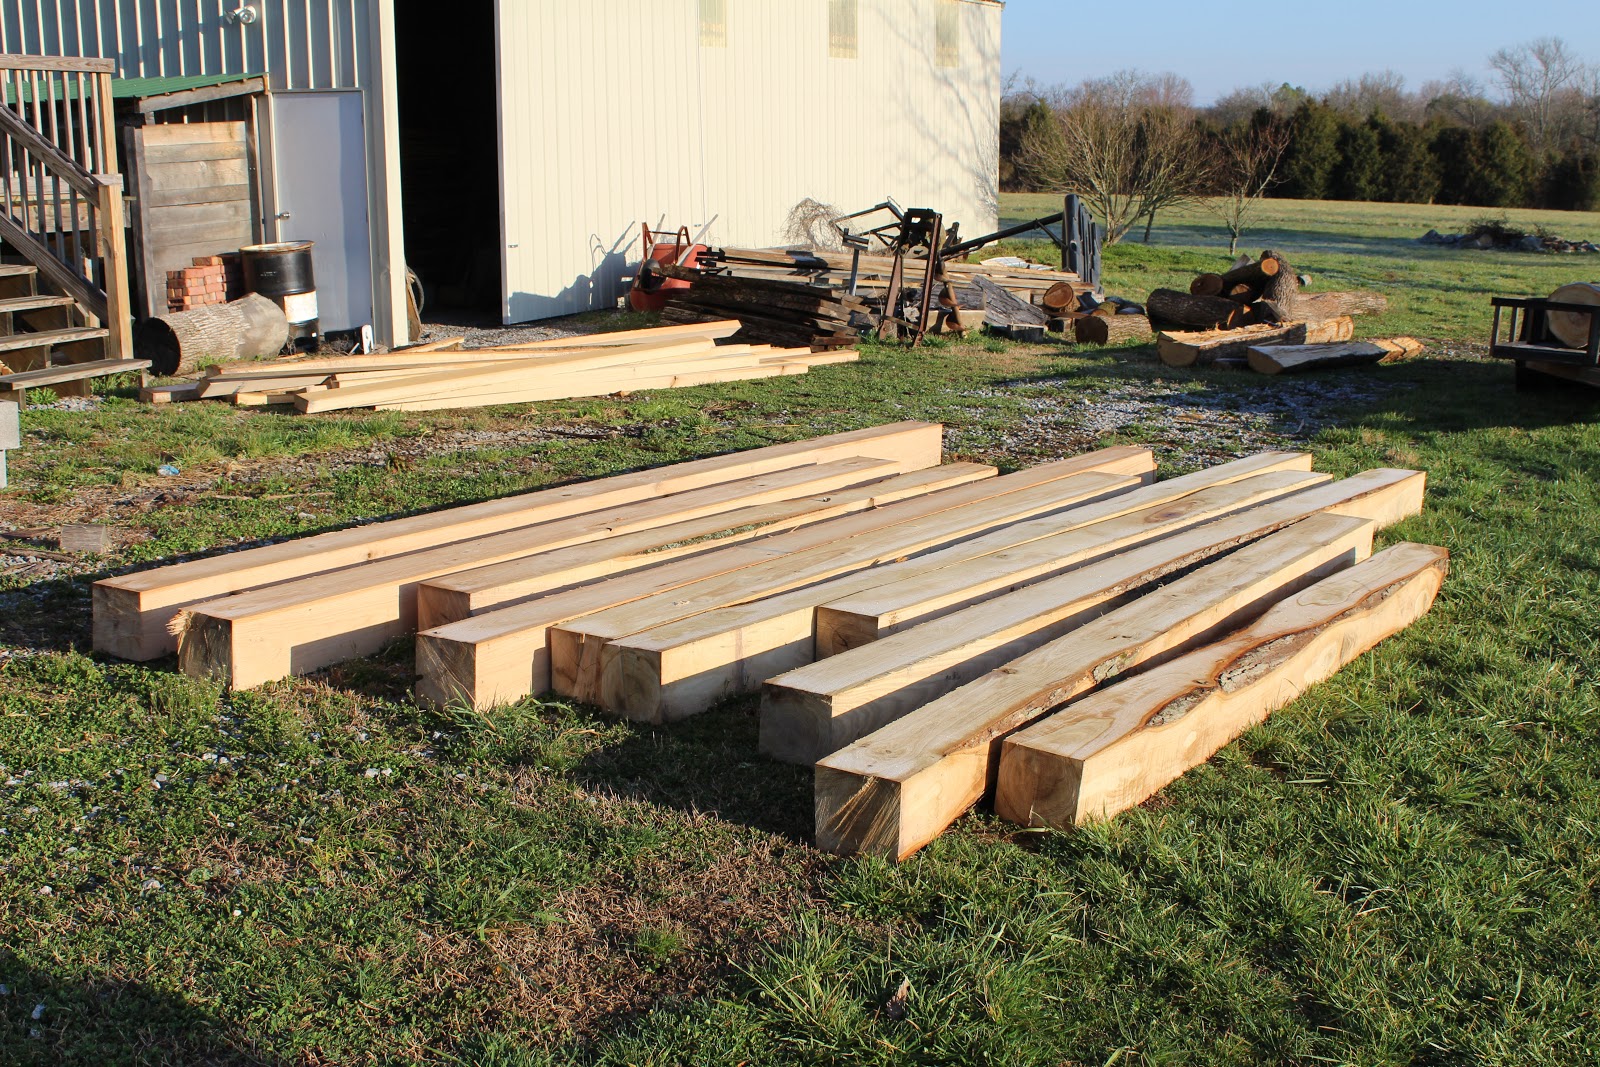
The sill plate timbers are complete. I cut the tenons on the 2 short side sills. I used the draw bore method for the peg. This is simply drilling the hole closer (1/8'') to the shoulder of the tenon so that when you peg the joint it will draw it tighter together. 

 The carpet dolly brought the timbers to the foundation of dry laid stone with ease.
 With the help from my friend Pete Wiens I had the timber pegged together in about 20 minutes.
 I am now ready to start the frame itself. One more trip to Indiana to cut and I'll have everything I need to finish the frame. After the frame is raised I can tap in more stones to tighten the foundation.
 I would like to leave you with a picture of the worst cherry log I ever cut. I receive lots of great logs whether it is from storms or someone taking out a tree near a house. On the rare occasion I will buy a log from a log yard in hopes of some really cool wood. This cherry log was suppose to be the one. I got a really good deal( I thought) . This log showed every sign of curly grain and a huge crotch section. After hours of cutting this beast on my mill I soon discovered it had wind shake so severe that it fell apart like an onion. I have never seen anything like it. Absolute junk. The log has now been discarded in pieces at the back of my lot. Be aware of cracks that go in circles along the growth rings at the end of a log. Wind shake. Lesson learned.

Tuesday, April 2, 2013

The Chain Mortiser

This morning after coffee and the usual chores that go along with owning farm animals I felt it necessary to dig out the old timber framing tools. I have 2 students coming to start a chair class tomorrow but today we will cut mortises. I have not used these tools since 2009 when I built my shop. It is good to sense their presence again. The 16'' beam saw cuts the ends nice and square. One note about any circular saw is to use paraffin wax (clear block on the timber) on the blade and the base of the saw. It will amaze you how much smoother the saw will handle. Please don't judge me about the wedge holding the guard back but it works for me. The beam saw cuts only 6'' deep so I roll the timber to complete the cut.
 The real star of the show is the chain mortiser. This tool does one thing and does it fast. Yea, I know it would be useless without 110 volts but I do have a chair business( I think) that I have to get back to. One day I would like to try hand hewing timbers and drilling and chopping the joints by hand but sometimes I just don't have time to take the back roads so I will take the interstate. This tool from Makita has held up very well. A bit pricey but still one of the cheaper models on the market.

 I started on the long sill plate. After cutting both ends square to length I lay out the mortise for the end plate tenon. It makes things cleaner to chop an outline of the mortise before using the chain mortiser. This is an aggressive tool so hold on tight.
 It leaves a nice square hole but must be cleaned up with the mortise chisel and slick. You still have to square up the bottom of the mortise.
 Everywhere there is a joint in this frame I will bring the faces down to 7''. This allows me to use timbers that are not sawn perfect. One example is this sill plate is 3/4'' bigger on one end. It's just the nature of the saw mill, wood flexing while sawing. I use a small circular saw to kerf down to make my 7''. Then I chop away excess with my carpenter axe.
 The slick and mortise chisel make quick work to clean up the joint. I really like Barr's timber frame tools. The edges really take a beating and stay sharp.
 By the end of the day I had one 16' sill plate complete. There is a lot going on in this piece. Mortises for end sills, post, and floor joist. A good start but tomorrow I'll be back in the shop teaching and rain will set in Thursday. Much more to come.
Monday, April 1, 2013

Rock

Lately all I can think about is rocks for the garden tool shed foundation. Today was a warm sunny day and it was rock stackin time. Rocks around here are rough and not always flat. But they are free and plentiful in creeks, ditches, and construction sites. They are everywhere.   

The key to a good foundation of field stone is careful layout of batter boards and mason string. The string is level to the top of the foundation and maps out the perimeter. Everything is dry stacked and small wedges of stone between the bigger rocks keep everything tight. Also the weight of the building will hold all the stones in place.
 It took a good part of the day to stack all the rocks that I had collected. I need almost as much again that I have already used. Lots of rain lately has made it impossible to collect from the local creeks so I will look elsewhere. One more day of stacking and I'll be ready to start the mortise and tenons on the white oak sill plates.
 This is "Little Mama" named from the previous owners. I love this chicken. She use to stand on my shoe when I would work in the shop. She is the only hen I have that nests her eggs. Little does she know there is no rooster and she is also sitting on a golfball. This is all she does all day. I collect the eggs daily so she still lays an egg every day. She is determined to hatch that golfball.
 Little Mama lays the cutest eggs. Notice the normal egg on the left and Little Mama's on the right. She does the best she can.

Friday, March 29, 2013

In Search of Stone

I just got back from delivering some pieces to a customer in the Pisgah National Forest in North Carolina. What a beautiful place. We stopped by Cades Cove on the way back. I wanted to check out the foundations of all the old cabins. I was shocked to see how most foundations were crudely stacked stones to make piers. 
 After looking at many structures I decided I liked the dry stacked stones on this cabin which is what I will do for the timber frame tool shed. My son Logan and I harvested many stones last summer in the local creeks but I realize I will need a lot more. Here in middle Tennessee there are as many rocks as there are republicans. I should have no problem finishing the foundation.

 I could not resist taking some waterfall shots during our trip. I really miss the mountains. It was 20 years ago this month that my wife and I were trapped in Pigeon Forge during the blizzard of 1993. It was called the storm of the century and Mt. LaConte got 5 feet of snow. We had reservations for Kephart trail shelter and never made it. They had to use military helicopters to rescue hikers out of the mountains.
 Sorry, I'm getting off topic. Here is Logan from our trip with a rock from the Little Pigeon river in the national park. He wanted to have one for the garden shed in the foundation. Logan is very sentimental and I find that a good trait in such a young man. I hope to have the foundation to the tool shed done soon. I have had lots of people interested in helping with the joinery of the timber frame so I'll post when I am ready to get started on the frame.
 Speaking of timber frames, Ziggy from the Dancing Rabbit is conducting a timber frame workshop this summer. If you want to learn the ins and outs of constructing a timber frame structure I can't think of a better place to go. You can sign up here.Timber Frame Workshop. Ziggy and April spent some time here at my shop building chairs and other projects last winter. They live unique lives without electricity in a cool cob structure they built in Missouri. You can learn a lot from them and I highly recommend the workshop.


Tuesday, March 19, 2013

Classic Settee Complete


The 6' settee is finished. The painting took as long as building the piece but I feel it was worth the time spent. This bench will travel with me to the next show in Nashville this spring at the TACA craft fair. Come by and check it out. It's the first weekend in May at Centennial Park.
Well, the garden tool shed has begun. Last week Bill and I cut most of the frame from white and red oak. I really enjoy cutting these on the mill and they cut really fast. 
I loaded all that my trailer would carry. 
  At home I unloaded everything by tying to a power pole and dragging them off. 8 x 8 post which are 16 feet long can weigh as much as 450 pounds when green. My challenge is how to move these around the yard. Back in 2009 when I built my shop I used a John Deere tractor with a front end loader. I no longer have access to this luxury.
 My answer came from our swing set frame and a carpet dolly. With the aid of a chain hoist, moving these beams was a piece of cake.
 Who needs a tractor?
  I was a carpet installer in high school and my old boss is my next door neighbor's dad. A quick phone call and I was re-united with the original carpet dolly I used 26 years ago. I guess you know my age now.
 I moved the sill plates in front of the shop to start the work. I am using white oak for the sills and red oak for everything above grade. I still need to finish the dry stone foundation which this shed will rest. If I failed to mention I will be doing Jack Sobon's garden tool shed from his book. This will be a 12 x 16 shed with an 8' deep front porch. Stay tuned.
 My wonderful hens have really taken to the new coop. I have 7 birds laying 7 eggs per day. Good to know they are all doing their part. Send me your egg recipes.

Saturday, March 16, 2013

Harvesting Timber Frame Logs

Here is a quick video from Bill Nelson and myself harvesting the logs for the garden tool shed I will be building later this spring. It is really an excuse to use my new HD camera and figure out how to edit. I have a lot to learn. Enjoy.


Tuesday, March 12, 2013

No...It Can't be Sprayed

 I have been busy lately with lots of various tasks. During these events I have been adding layers of milk paint to this settee. From red to black. Two coats of each. It has been a slow process and I have pulled out all the patience I have to keep going. Someone asked if it could be sprayed. Maybe, but not by me. I tried to spray shellac on a chair years ago with not so good results. Too many dry spots and I could imagine milk paint would be worse. What keeps me focused is the fact that all the time spent to make this piece successful relies on how well I execute the finish. It takes me about 3 hours for one coat with coffee breaks. It's just time, and if I skip a coat because I am lazy I'll surely regret it and wish I had not been in a hurry. Can you tell I am tired of painting this thing? Tomorrow one last coat of black.

  I did find time to open up the new white oak log to see if my money was well spent.
SCORE! Lets hope it bends as good as it looks. It did have some minor twist but not a problem. Isn't wood awesome?
 That's as straight as it comes and this is the second cut log from this tree. Wish I had the butt log.
 It has been a year since I cut this very clear and nice quarter sawn poplar log. Can anybody tell what I am going to make with these boards? Does the book give any clues?

I just received some new toys in the mail. This is the first time I have ordered tools from Patrick Leach and I have to say they are top notch. I asked for good user tools (I am not a collector) and he sent me these beauties. A 605 Stanley and 4 1/2 smoother. These will be a big part of the project with the quarter sawn poplar. More to come.